

Some features in VDK-Studio Web require audio files to function properly. We’ve designed a seamless workflow to make file management easy and efficient:
Use the dedicated upload modal to add your audio files directly. Files are automatically converted to a standardized format and sample rate, ensuring full compatibility with our technology.
The built-in Audio Asset Manager gives you complete control:
-
Upload new audio files in seconds
-
Create Folders to organize your files
-
Rename, Move or Delete files and folder to keep your workspace clean
-
Transcribe audio files to later use them in Unit Testing
-
Export, edit out of VDK Studio then Import your Assets back
How to manage my Audio Assets ?
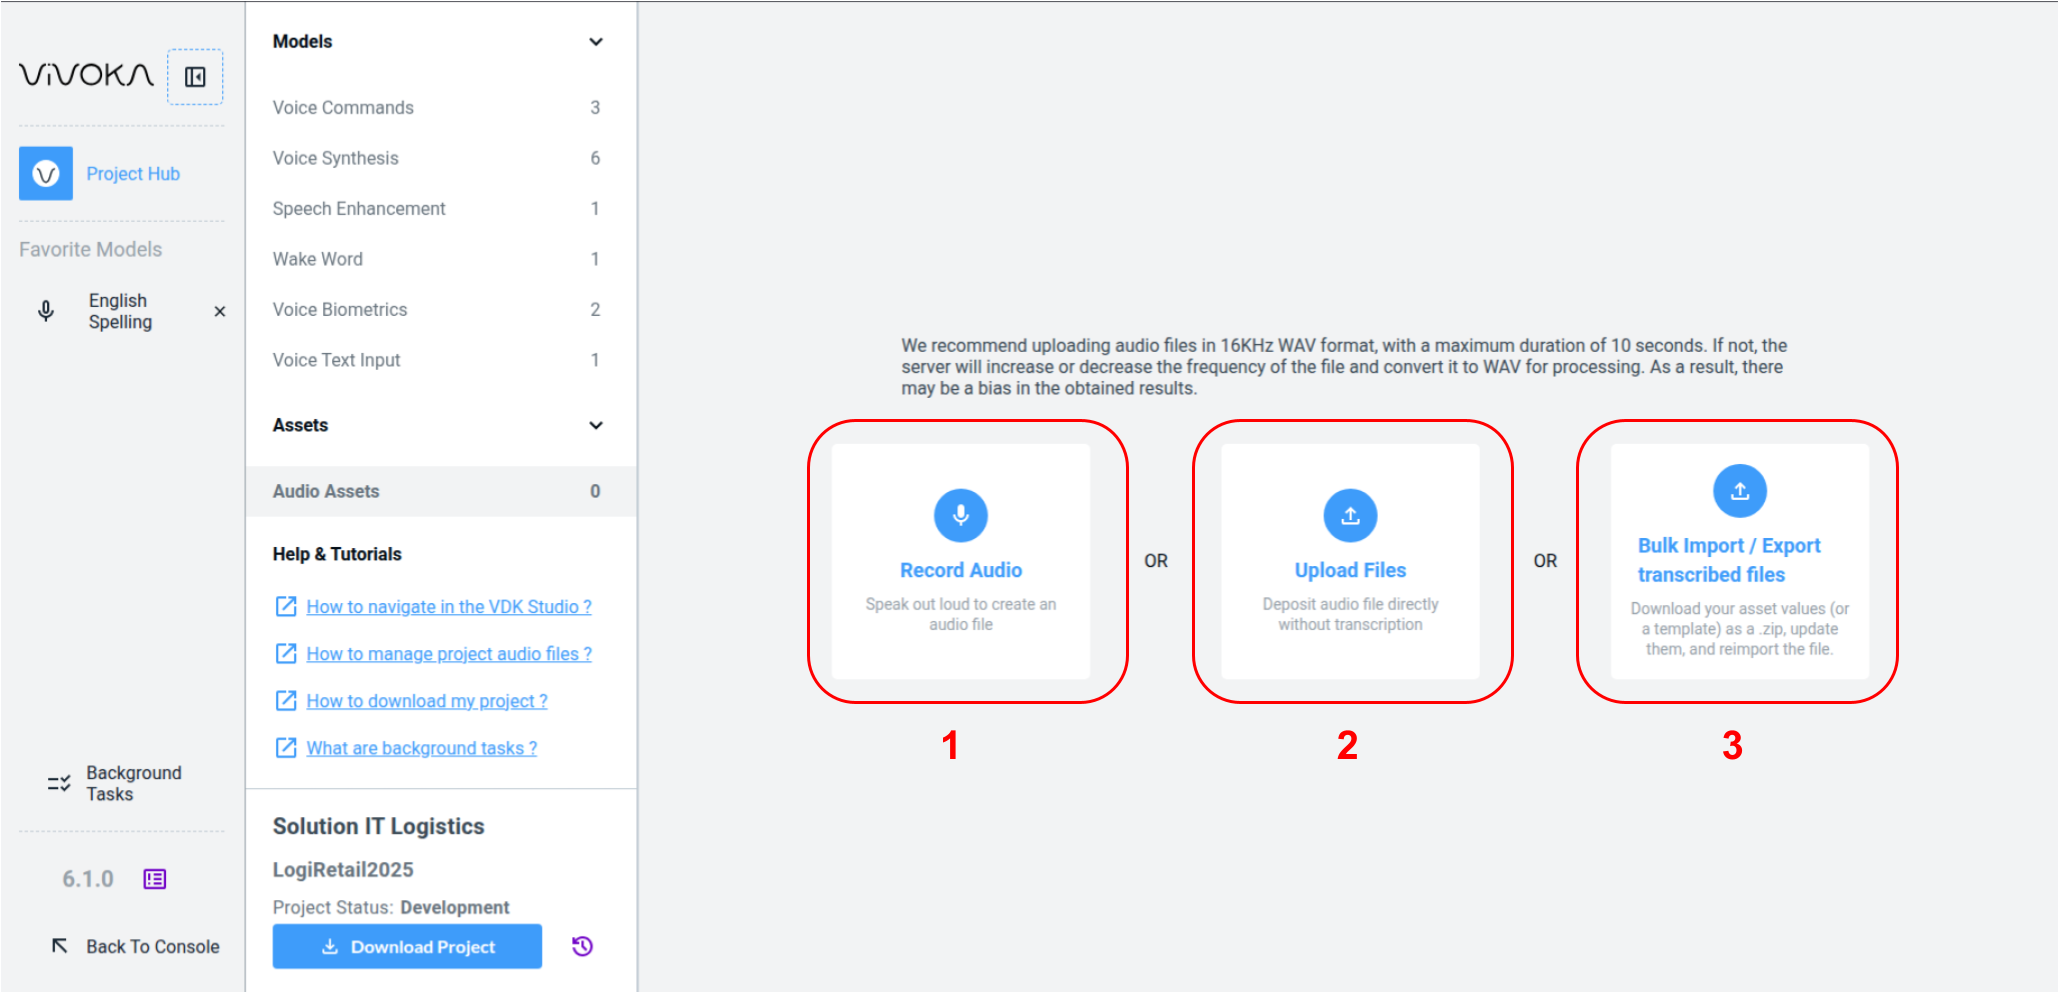
The first time you open your project’s Audio Asset library, you can either start recording (1) audio from scratch or import audio files (2) directly from your computer. You can also import a ZIP file with audio files and their transcriptions using the Bulk Import / Export transcribed files button (3).
(1) How to record my voice ?
How to record my voice ?
Hit start recording to capture your voice live. Recordings last up to 10 seconds and stop automatically. Audio files record at 16 kHz sample rate in WAV format.
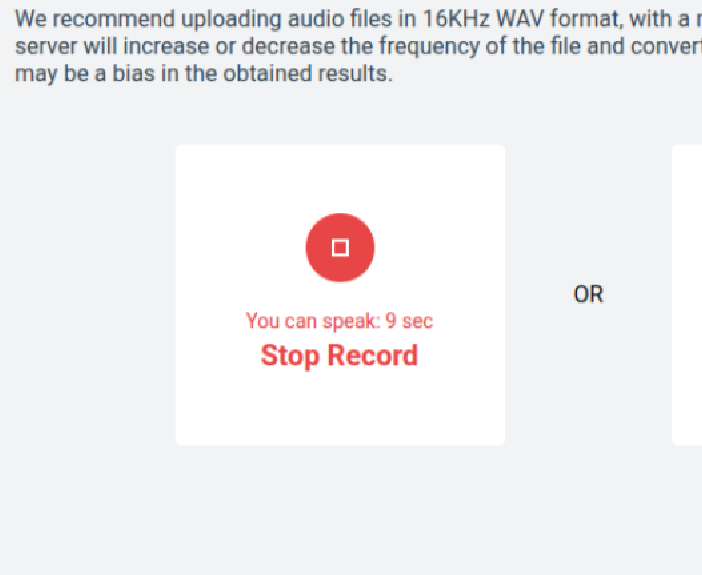
When your audio asset library isn’t empty, you’ll still see the record button next to the import file button but in small version.

(2) How to import files ?
Introduction to the file format
We recommend uploading lossless audio files for the best recognition by our technologies. Lossy files work too, but note that performance may drop.
Each file has a size and duration limit: 20MB and 10 seconds max. You can upload as many files as you want—no limit there, aside from decency. We limit duration to 10 seconds because voice recognition works best with short sentences, like commands or wake words. This limit suits any unit tests you want to try.
Please note you can upload audio files with at least a 16 kHz sample rate. Any file not in WAV 16 kHz will quickly be converted automatically to this format to work with our technologies.
How to import files ?
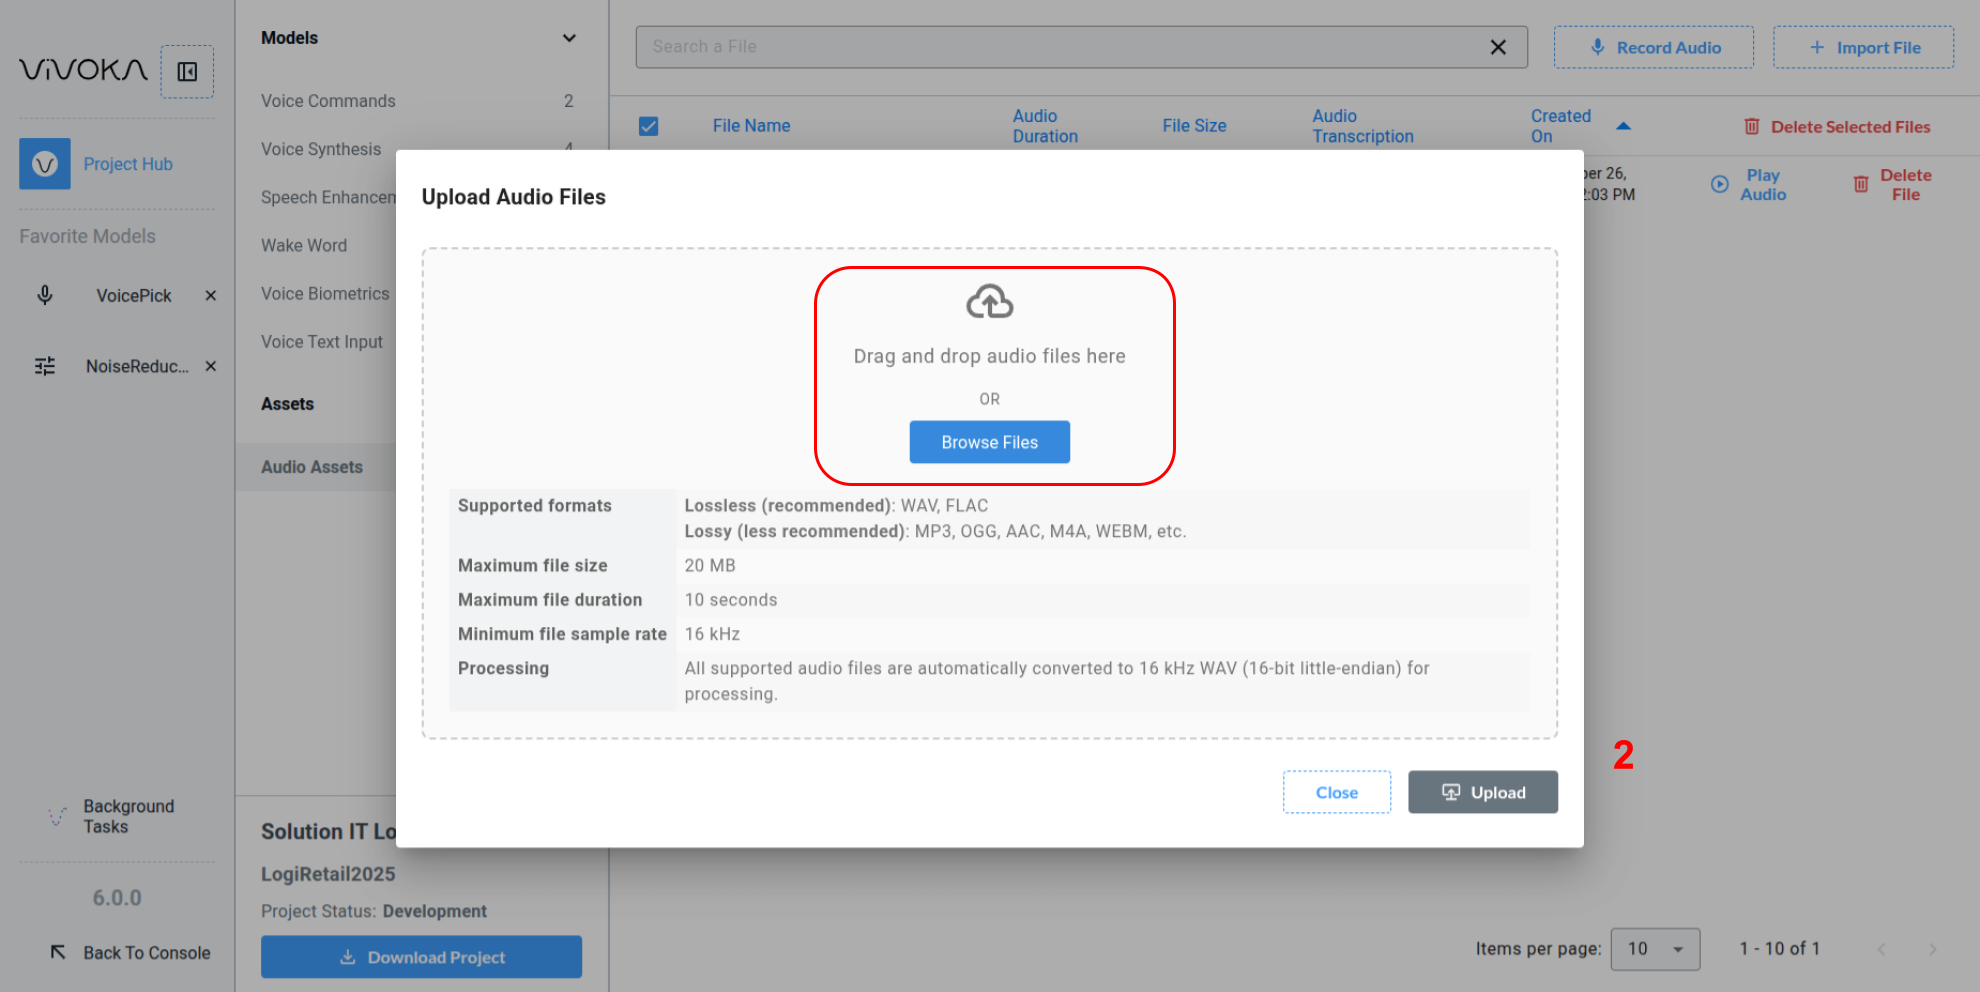
Click browse files or drag your audio files onto the cloud icon. Please ensure your files match the detailed table's expectations, or the server will reject them.
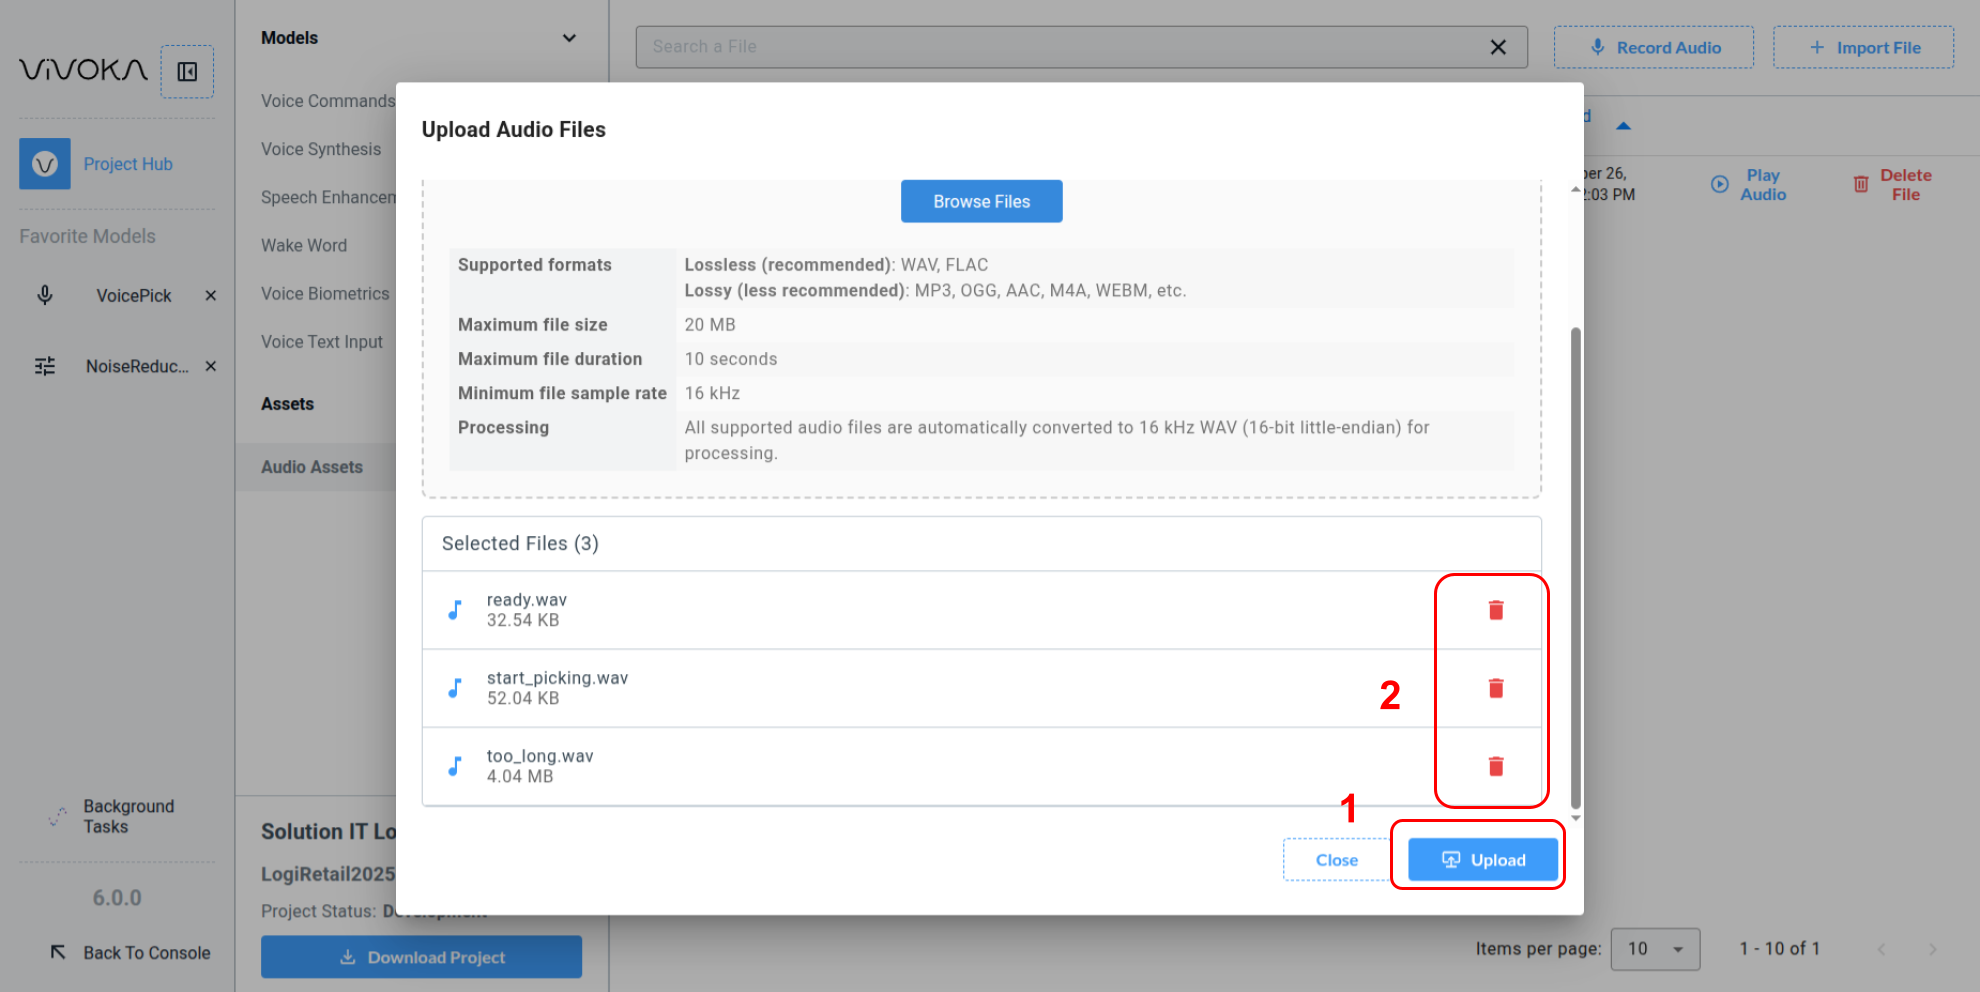
You can add or remove files (2) until you decide it’s ready for upload (1).
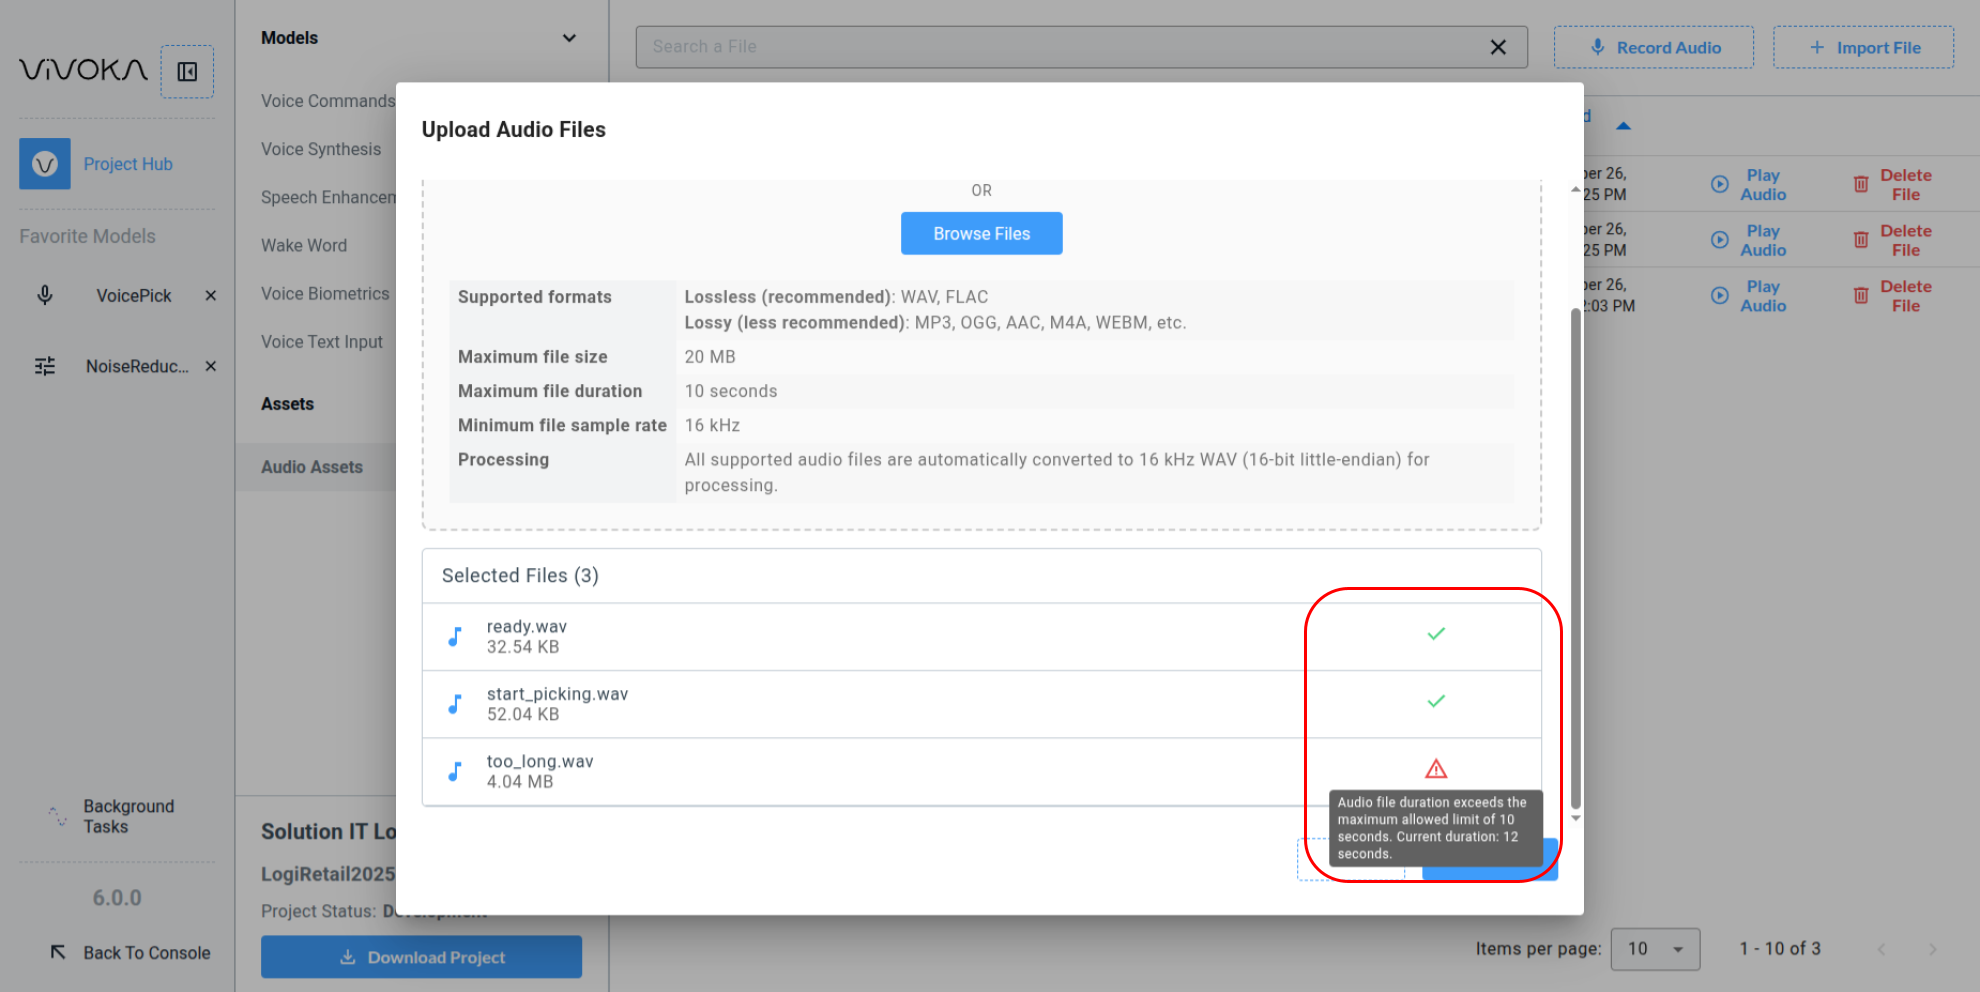
Each successfully uploaded file gets a green checkmark. Each failed upload shows a red warning icon you can mouse over to see why the server rejected it.
(3) I want to import transcribed audio files
The bulk import follows all constraints outlined in the How to import files? section.
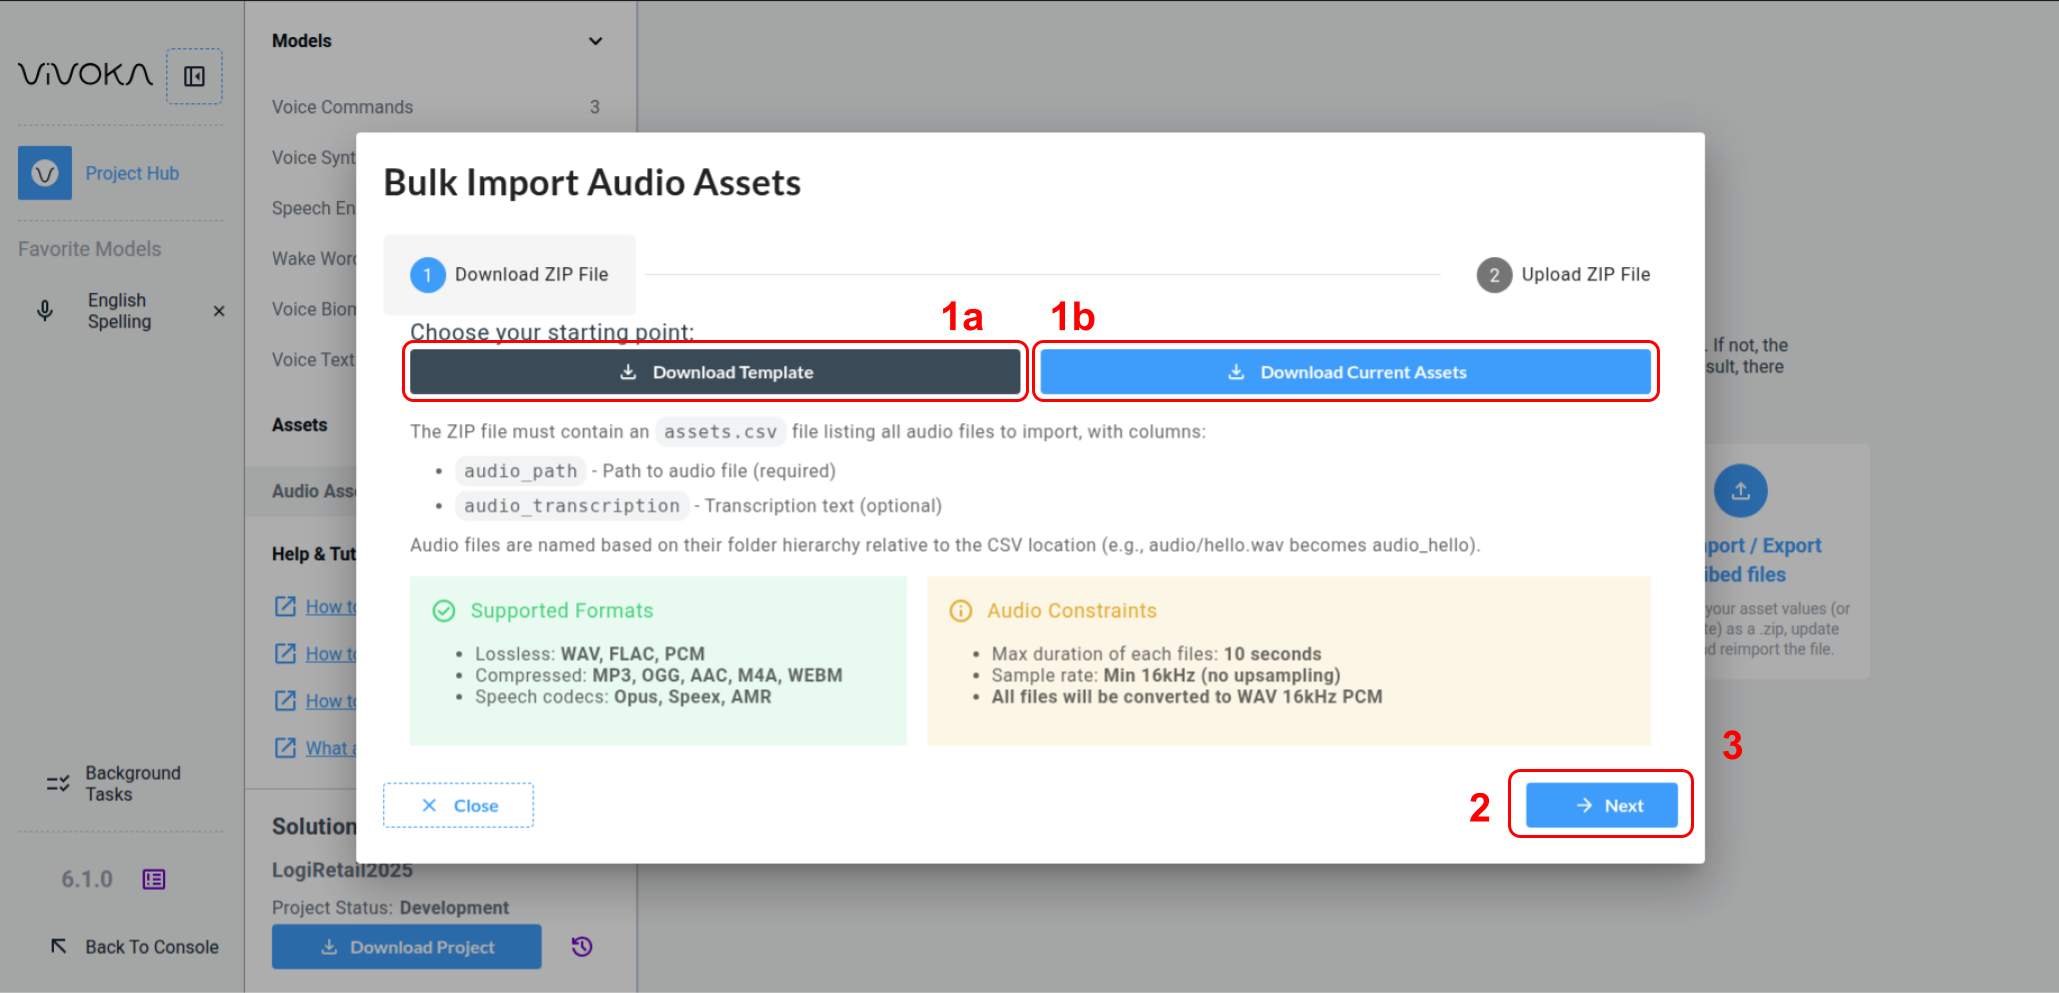
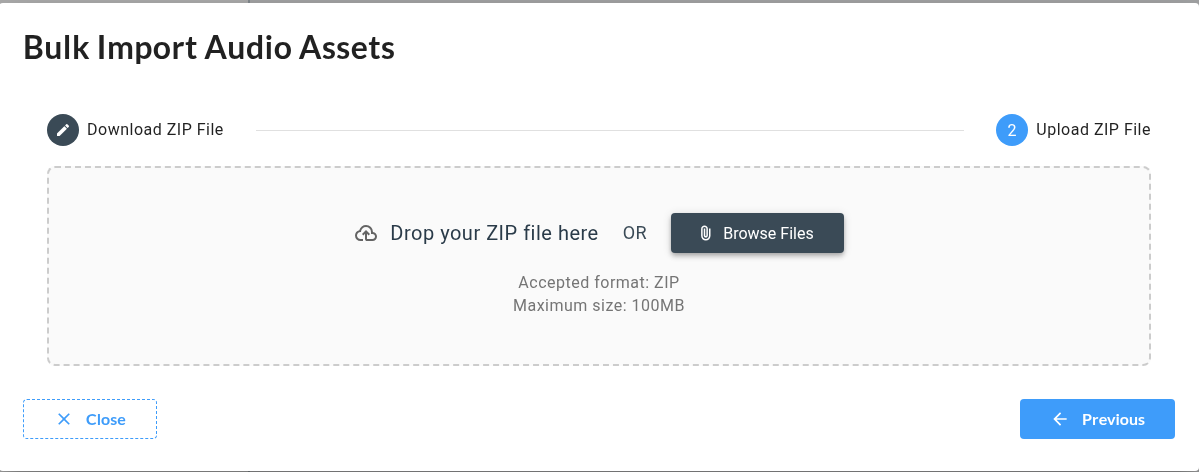
To understand the ZIP format, you can Download the Template (1a) zip file or download the project’s previously uploaded (or recorded) files using the Download Current Assets button (1b).
Modify the extracted ZIP by adding your audio files and editing the assets.csv reference file. This file contains audio_path and audio_transcription properties.
CSV Structure
The CSV file must contain two required columns (in any order):
-
audio_path: Path or filename of the audio file -
audio_transcription: Transcription text for the audio
Example CSV (assets.csv):
audio_path,audio_transcription
ready.wav,ready
start_picking.wav,start picking
With extra columns (ignored):
category,audio_path,audio_transcription,duration,notes
sounds,ready.wav,ready,0.5s,example sound
sounds,start_picking.wav,start picking,0.8s,another example
Click the next button (2) when your zip is ready to be uploaded.
Upload Zip file
Import Behavior
When you import this ZIP (or a modified version):
-
CSV is parsed with flexible column ordering
-
New files are imported as new assets
-
Existing files (same name AND size) are skipped to enable continuous synchronization
-
Modified files (same name but different size) are updated
-
Invalid files are skipped with detailed error messages
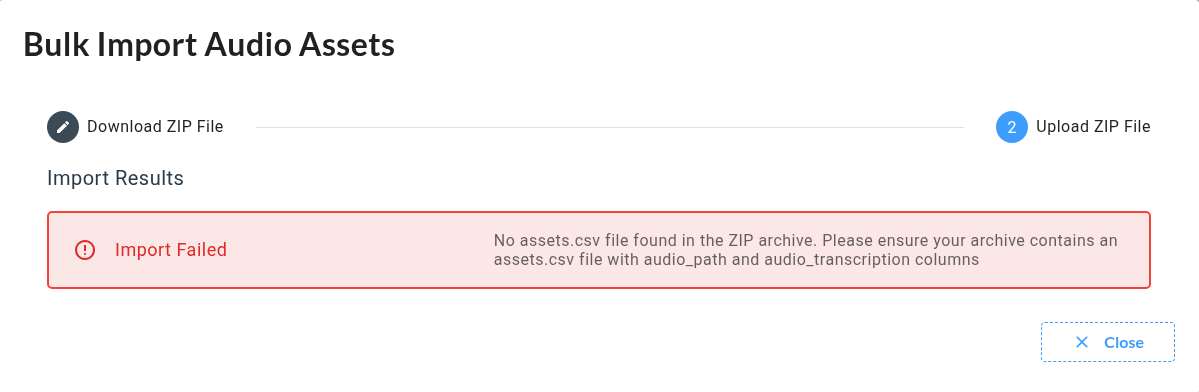
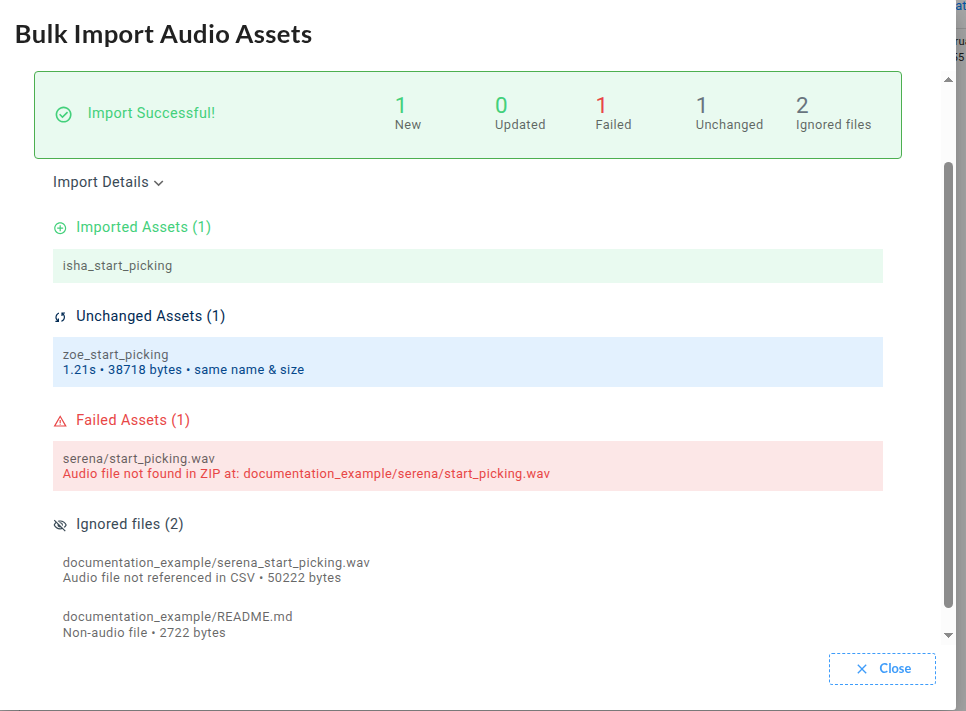
You can make consecutive uploads and see what has been wrong, successfull or ignored during the process.
Transcriptions are mandatory for Unit Testing. Please take a look at our dedicated documentation.
.png?cb=5b5729d4fad85bbb35672407c4803c9d)
-
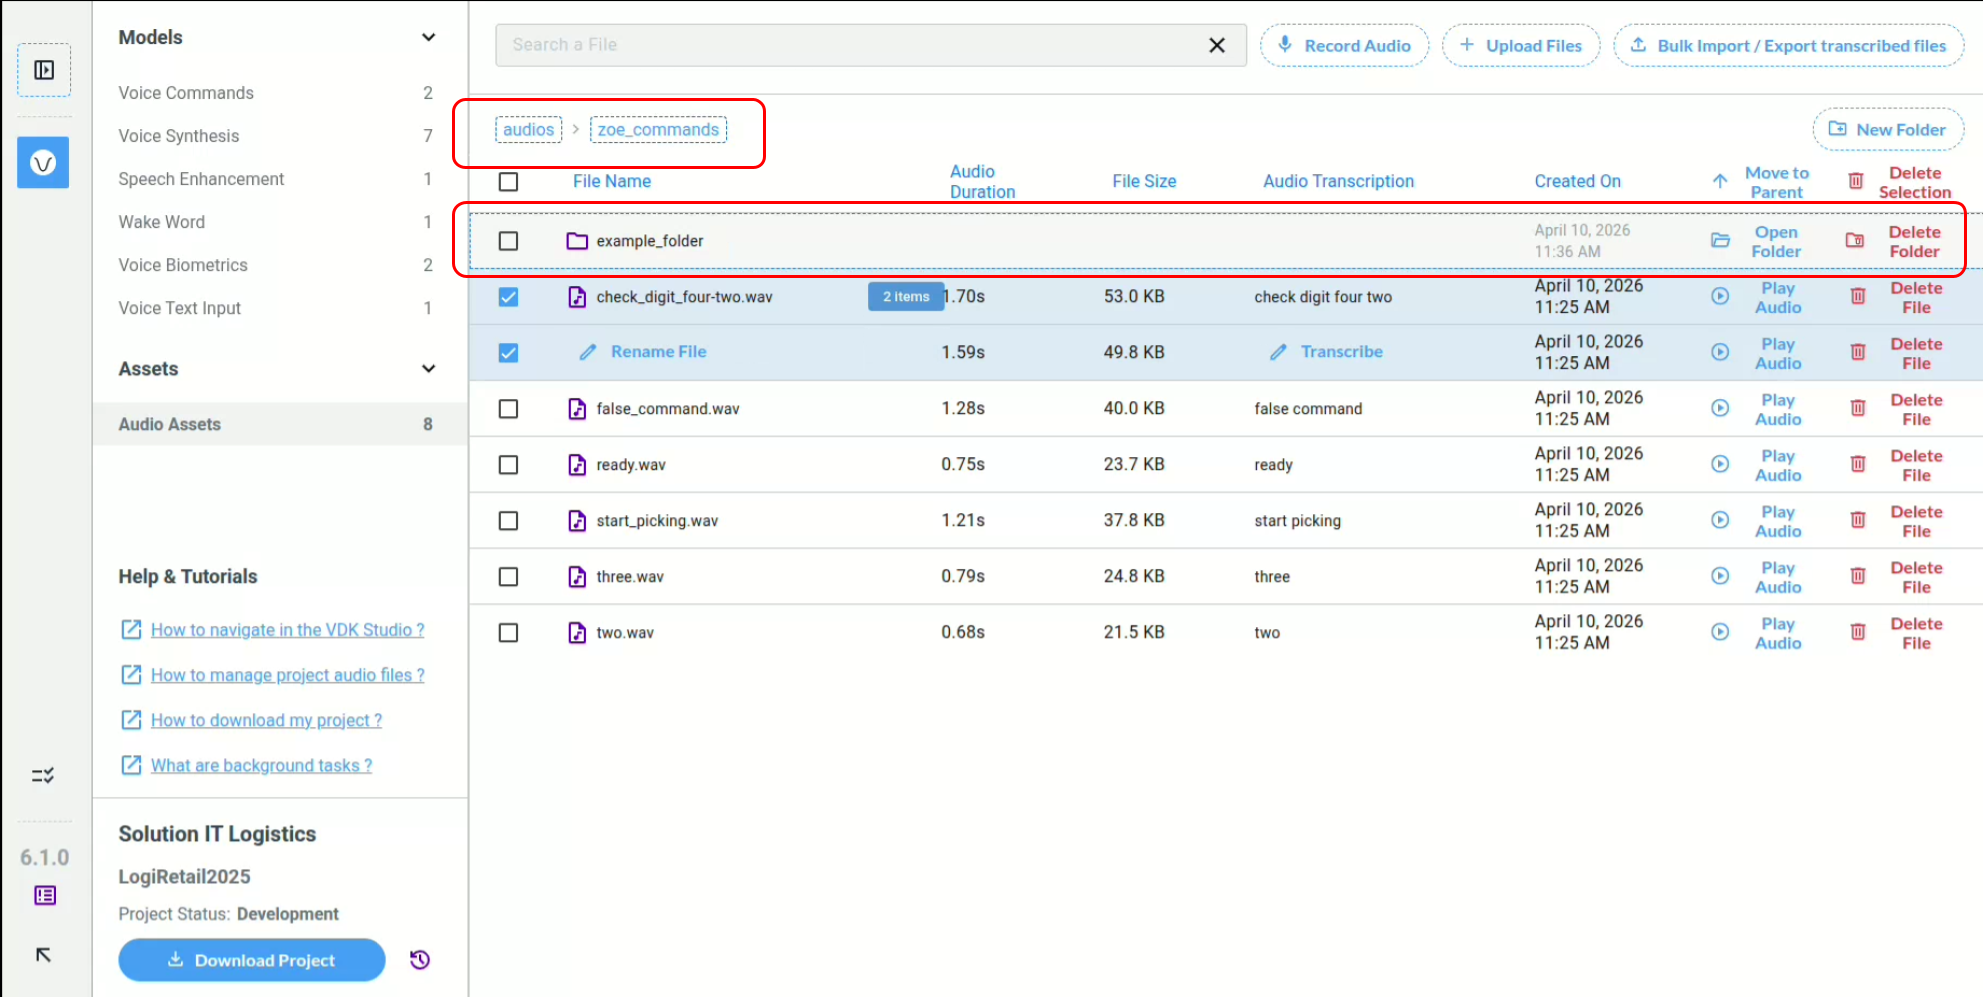
You can find the Record Audio button (1) to record immediatly an audio file. Please note this is limited to 10 seconds.
-
To import files, you can use the Import Files button (2a) or the Bulk Import transcribed files button (2b) in the page's header toolbar. Import Files feature is limited to 20 files by proposing you to drag or select files on your computer. Bulk Import invites you to build a simple ZIP file that contains folders and files, there is no limit using this import method. It also provides a way to import transcription directly for your files.
-
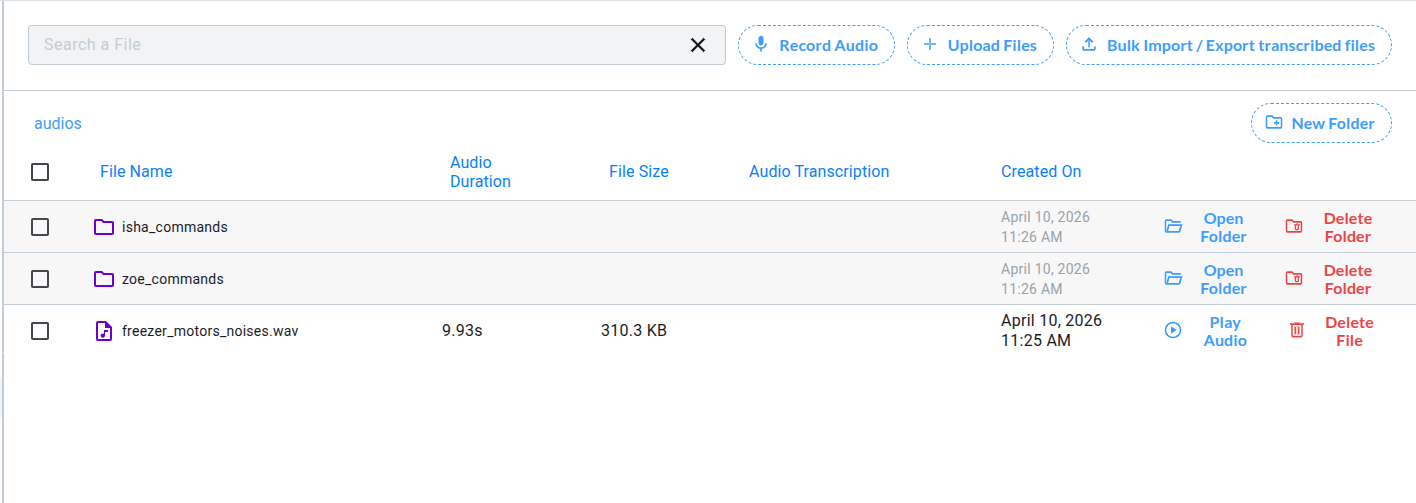
Manage your files by using the New Folder button (3a) or navigating through your folder structure with Open Folder button (3b) or directly using the Breadcrumb bar (3c).
-
Each Audio Asset file can be played back (3) or deleted permanently (4).
-
Files can be renamed (5) and transcribed (6). Transcription is required for the Unit Testing features.
-
Delete selected files and folder using dedicated Delete buttons (7) or hit Suppr on your keyboard
-
You can select multiple files using the dedicated checkboxes (8) or clicking in the row.
-
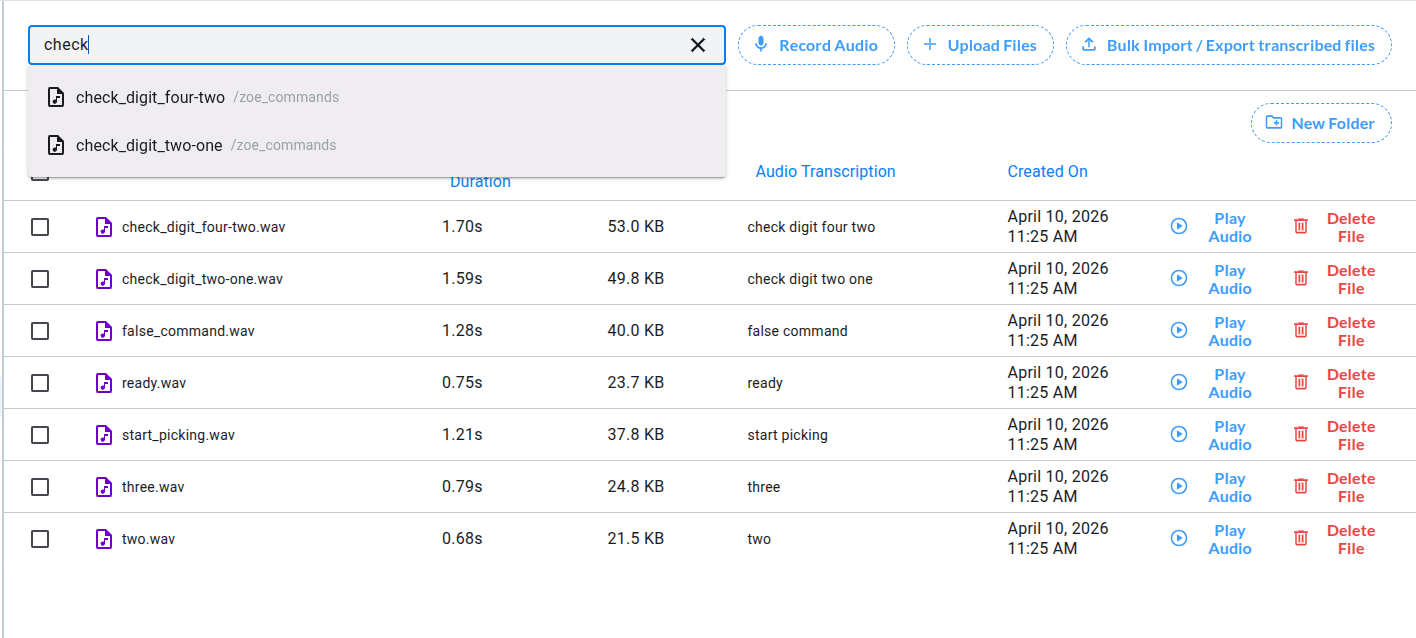
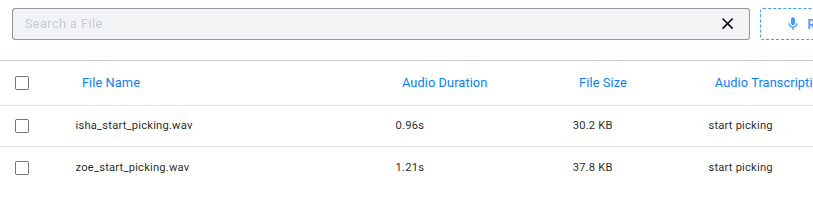
A search bar (9) is available to help you find paginated (10) Audio Assets that are not immediatly visible.
-
The total number of Audio Assets (10) in your project is displayed in the secondary menu.
We implemented several Operation System interaction with the Mouse and Keyboard:
-
Select or unselect an item by clicking its row
-
You can remove selection by hitting Suppr key
-
You can copy, cut and paste using standard Ctrl+C, Ctrl+X and Ctrl+V
-
Finally you can Double Click to enter a Folder
You will find our Audio Asset Management in several places within the VDK-Studio Web. For example, when using Unit Tests or the Speech Enhancement widget, you may be asked to attach an audio file to test the feature. The Audio Asset Manager will appear either directly on the page or within a dedicated modal.