

Introduction
Voice Commands Unit Testing is a crucial process for validating the reliability of voice recognition systems in real-world scenarios. At its core, this approach involves batch-comparing audio file transcriptions against the recognized commands defined by your voice commands grammar.
Ensuring Accuracy in Real-World Environments
The objective is clear: to verify that your Voice Commands model can accurately interpret user or employee inputs, even under conditions that mimic production environments. This ensures that the system performs as expected when deployed, minimizing errors and maximizing efficiency.
The key to effective Voice Commands Unit Testing lies in the quality and relevance of the audio data used. You’re not just testing with any audio—you’re using production-quality recordings that reflect the actual conditions in which the system will operate.
This means using the same microphone setups, capturing specific voice accents, and even simulating noisy environments where commands may be issued. By doing so, you create a robust testing framework that accounts for variables like background noise, speech patterns, and hardware differences, all of which can impact the accuracy of voice recognition.
Beyond technical validation, this method bridges the gap between controlled lab testing and the unpredictable nature of live environments, ultimately leading to a more seamless and trustworthy development process.
How to proceed with unit testing?
Access unit tests through the dedicated button in the Voice Commands widget. note that you must have access to the Voice Commands technology to view this page.
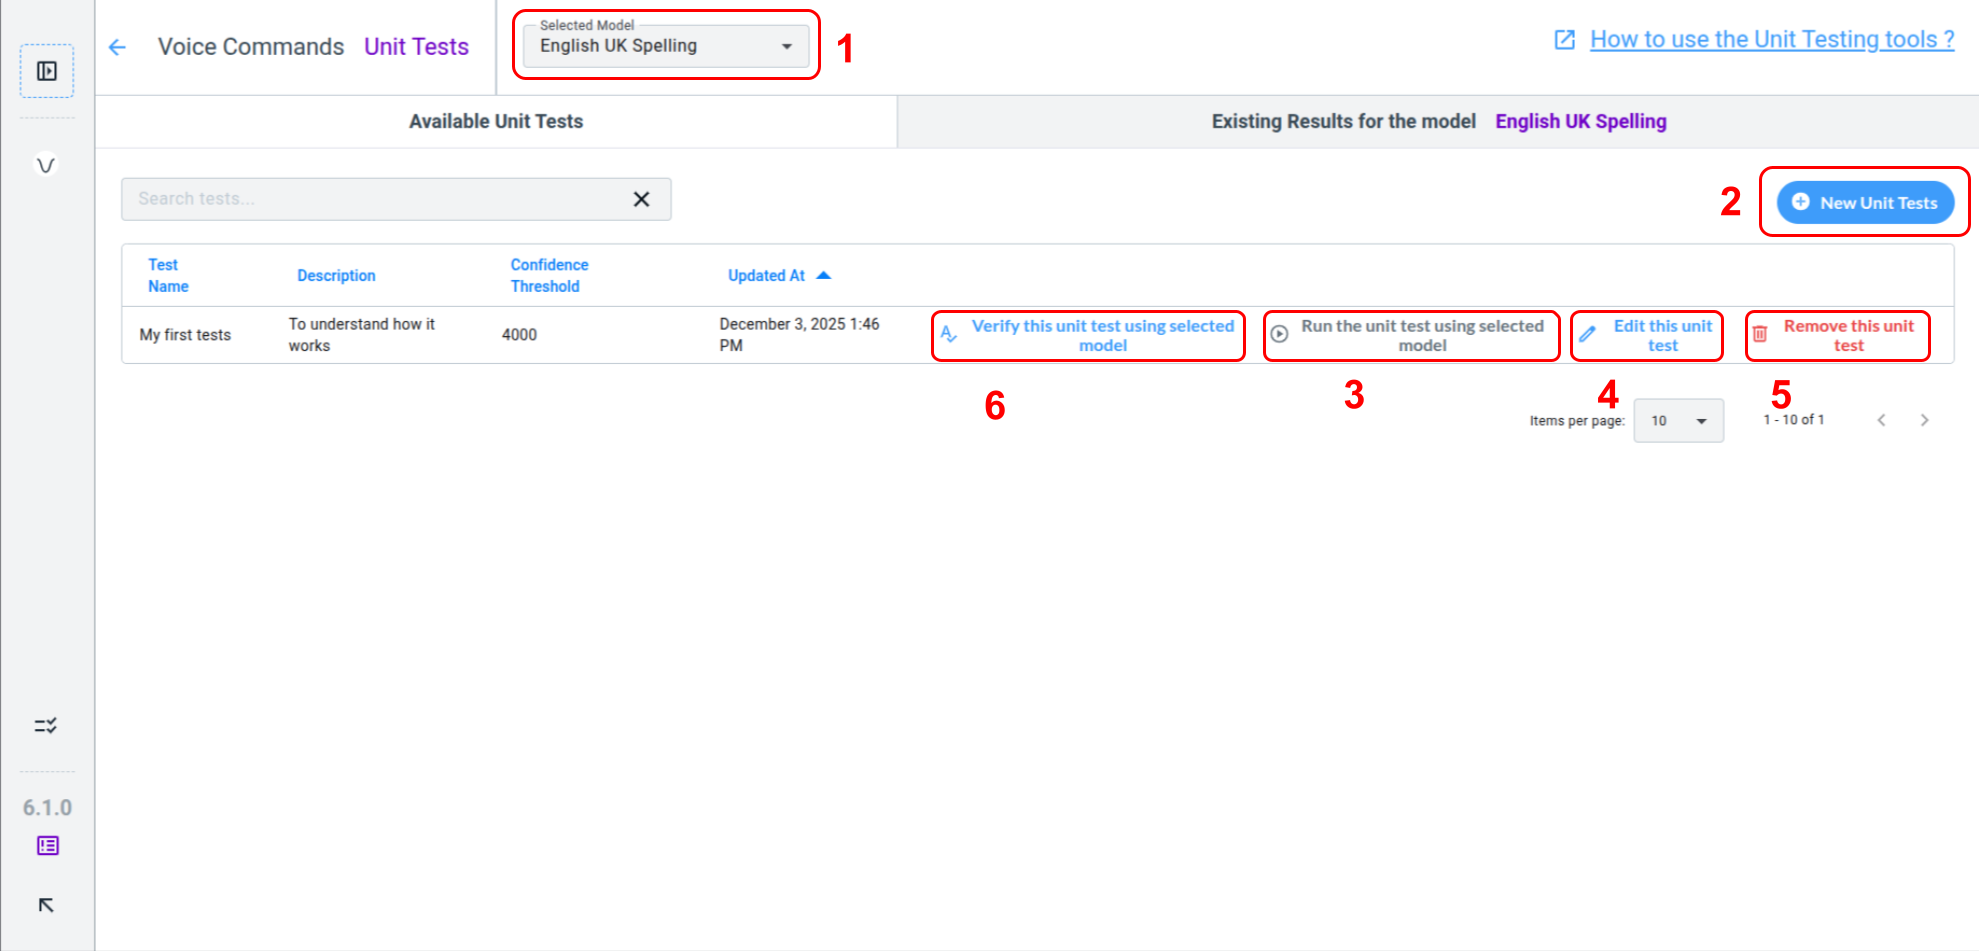
You can find the New Unit Tests button (2) to start creating a Unit Test.
Test the Selected Model (1) using the Run the unit test using selected model button (3). This creates a pending process and a Background Task. See the Background Tasks documentation for details.
The Edit this unit test button (4) allows you to fix transcriptions, add or remove tests, or adjust the confidence threshold. You can Remove Tests (5) without affecting result history. Test results remain independent of the Unit Tests used.
In order to verify that everything is setup correctly inside the test, you can use the Verify this unit test using selected model button (6). It will attempt to verify that every audio transcription within the test is a possible voice command in your selected model’s grammar.
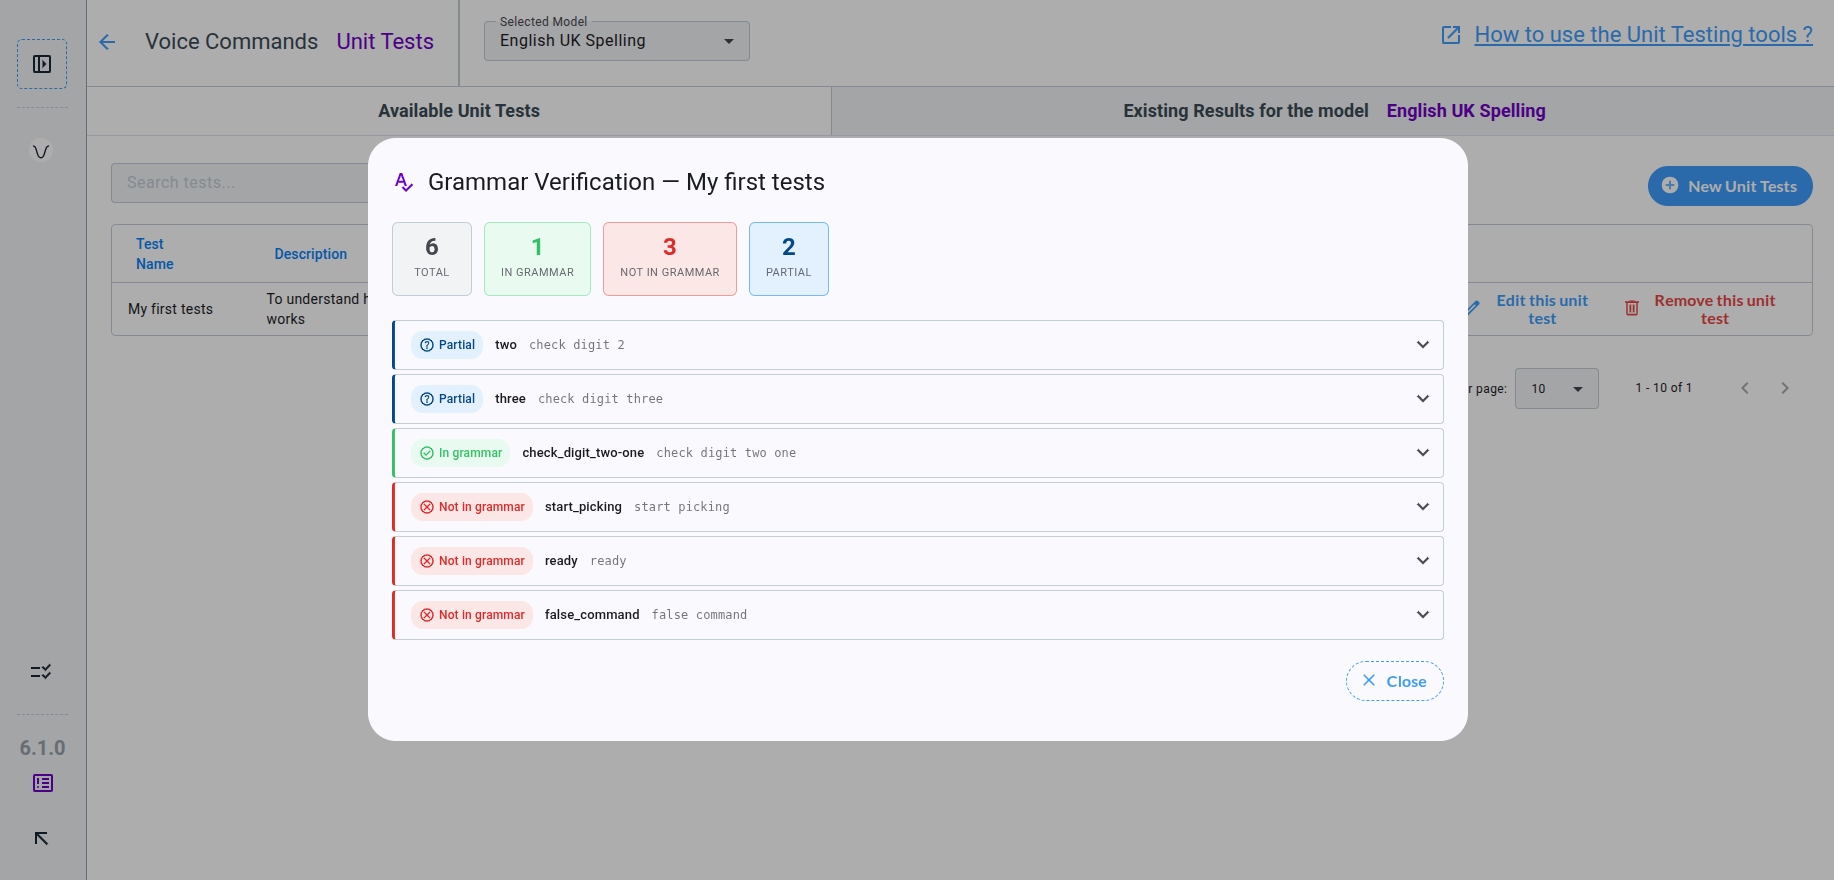
Grammar Verification does verify that the grammar contains a solution to match audio transcriptions of the Unit Test. If no solution can be found, the result is Not In Grammar. Partial means that the transcription can be included in a solution, but not with exact match. When a exact solution is found, the grammar match the audio transcription, result is In Grammar and the test is ready to be executed.
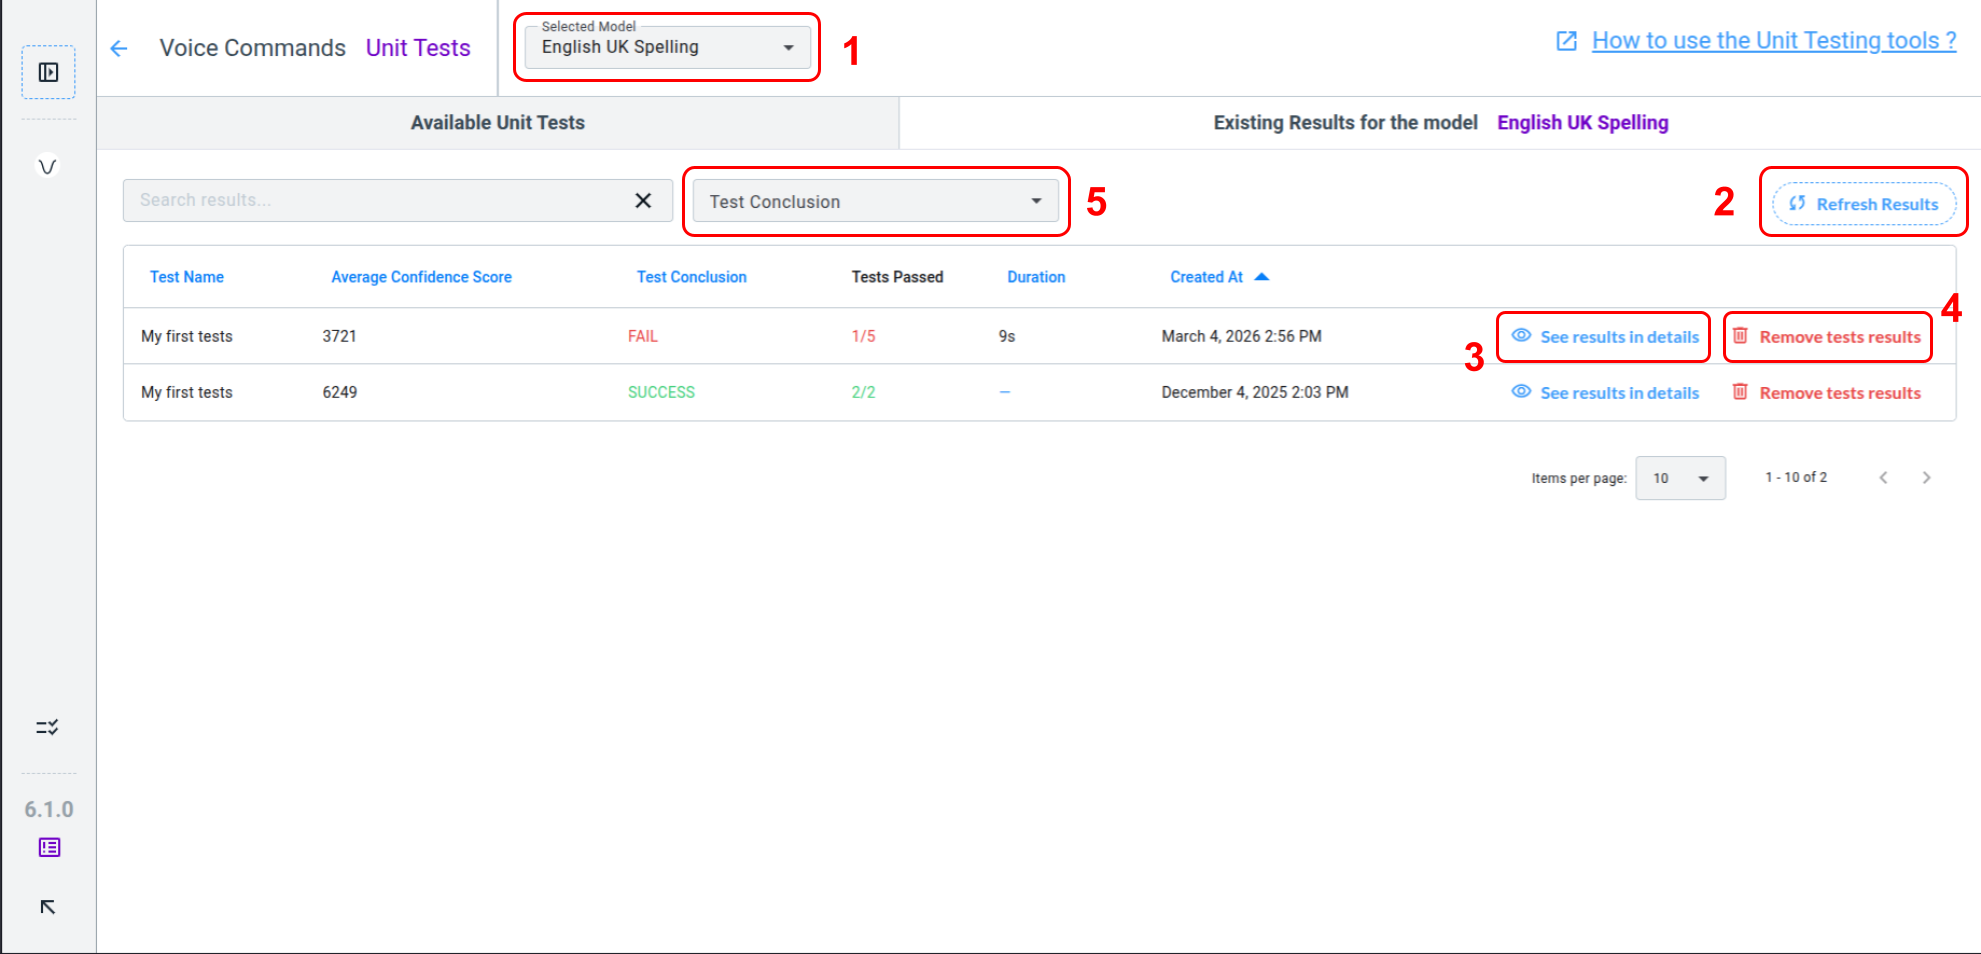
Click Refresh Results (2) once the task is complete to display the Test Conclusion and enable the See results in details button (3), even if the test failed. Test failures are valuable feedback, and guidance on interpreting them is provided in the second part of this documentation: Understand Results.
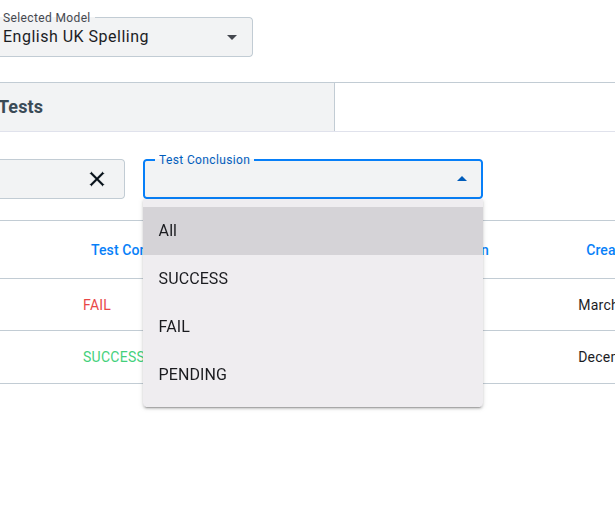
You can Remove tests results (4) from the history if desired. This action does not affect your tests, models, or another project data. Results can be filtered using the Test Conclusion filter (5).
How to create a Unit Test ?
How to create a Unit Test ?
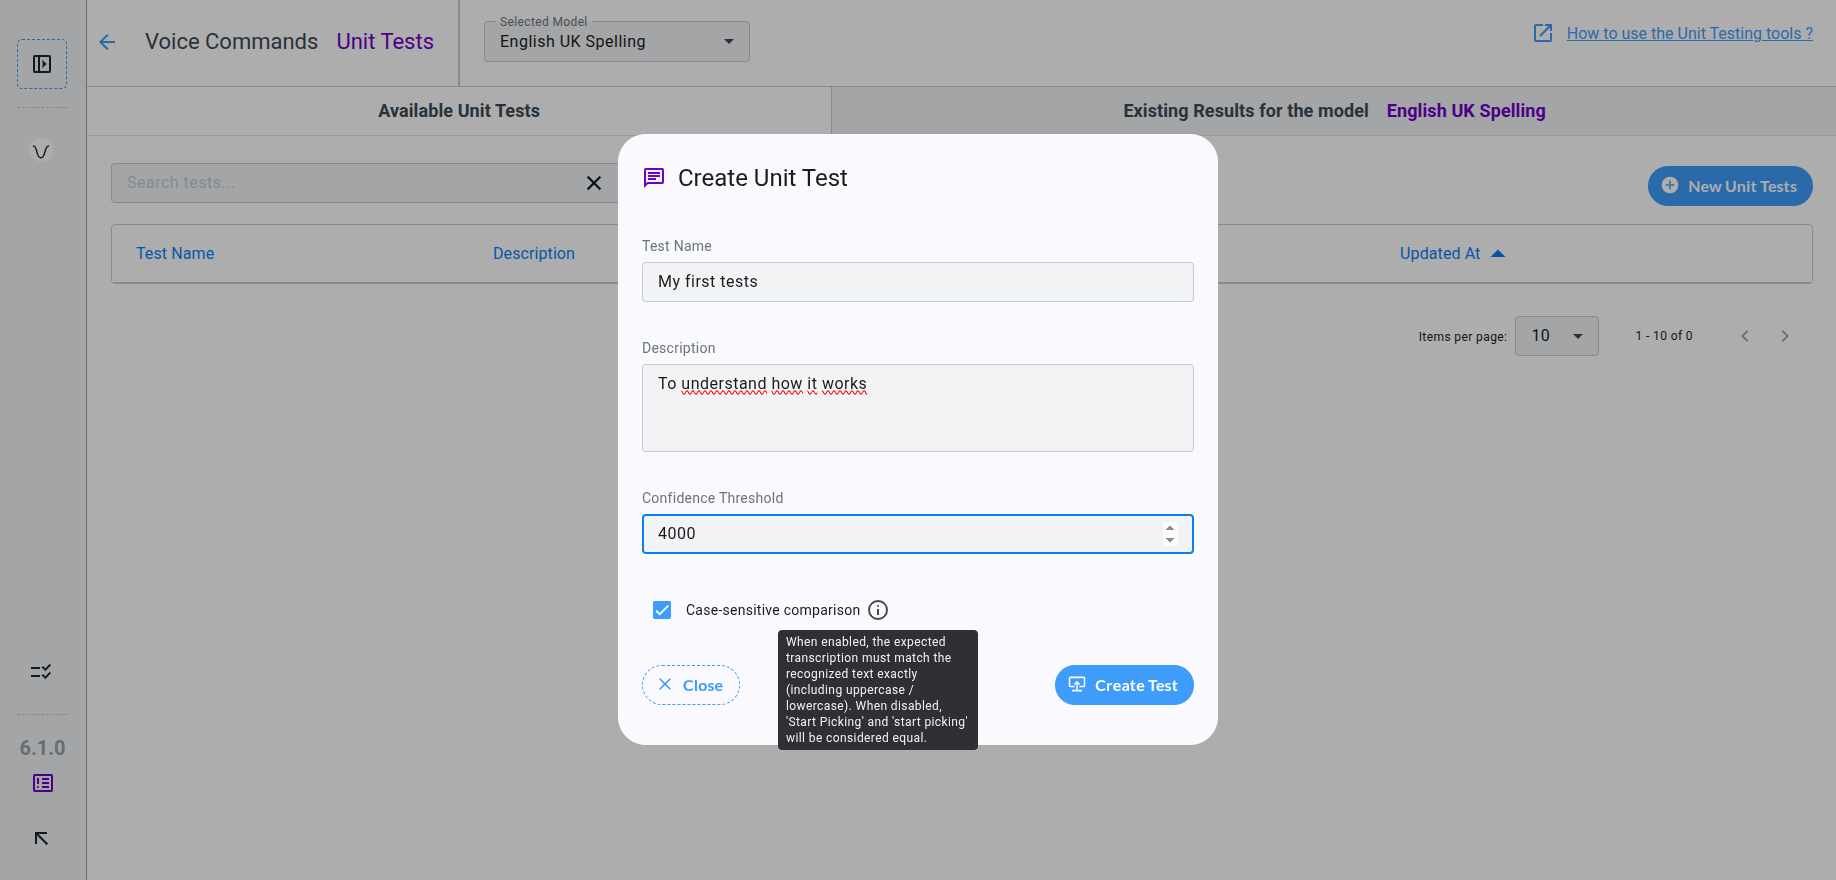
After completing the Create Unit Test Form, you access the page to edit the test content. While browsing your Audio Asset Library, ensure every file you add to the test is transcribed.

Your Unit Testss need at least one Audio Asset, which you can obtain by using record or import (1) features. Refer to our decicated documentation for more details.
Your Audio Asset must be transcribed before it can be used in a Unit Test. Hover over the table row to reveal the transcription button (3). Transcriptions should contain only one sentence and no punctuation.
You can then add your files to the test using the Add to test button (4a) or select specific files (2) and add them all at once with the Add selected files button (4b). If you organized your audio asset files within folders, you can add directly a folder to your test using the Add Folder to Test button (4c). Remember that any files in this folder must be transcribed to be use in the test.
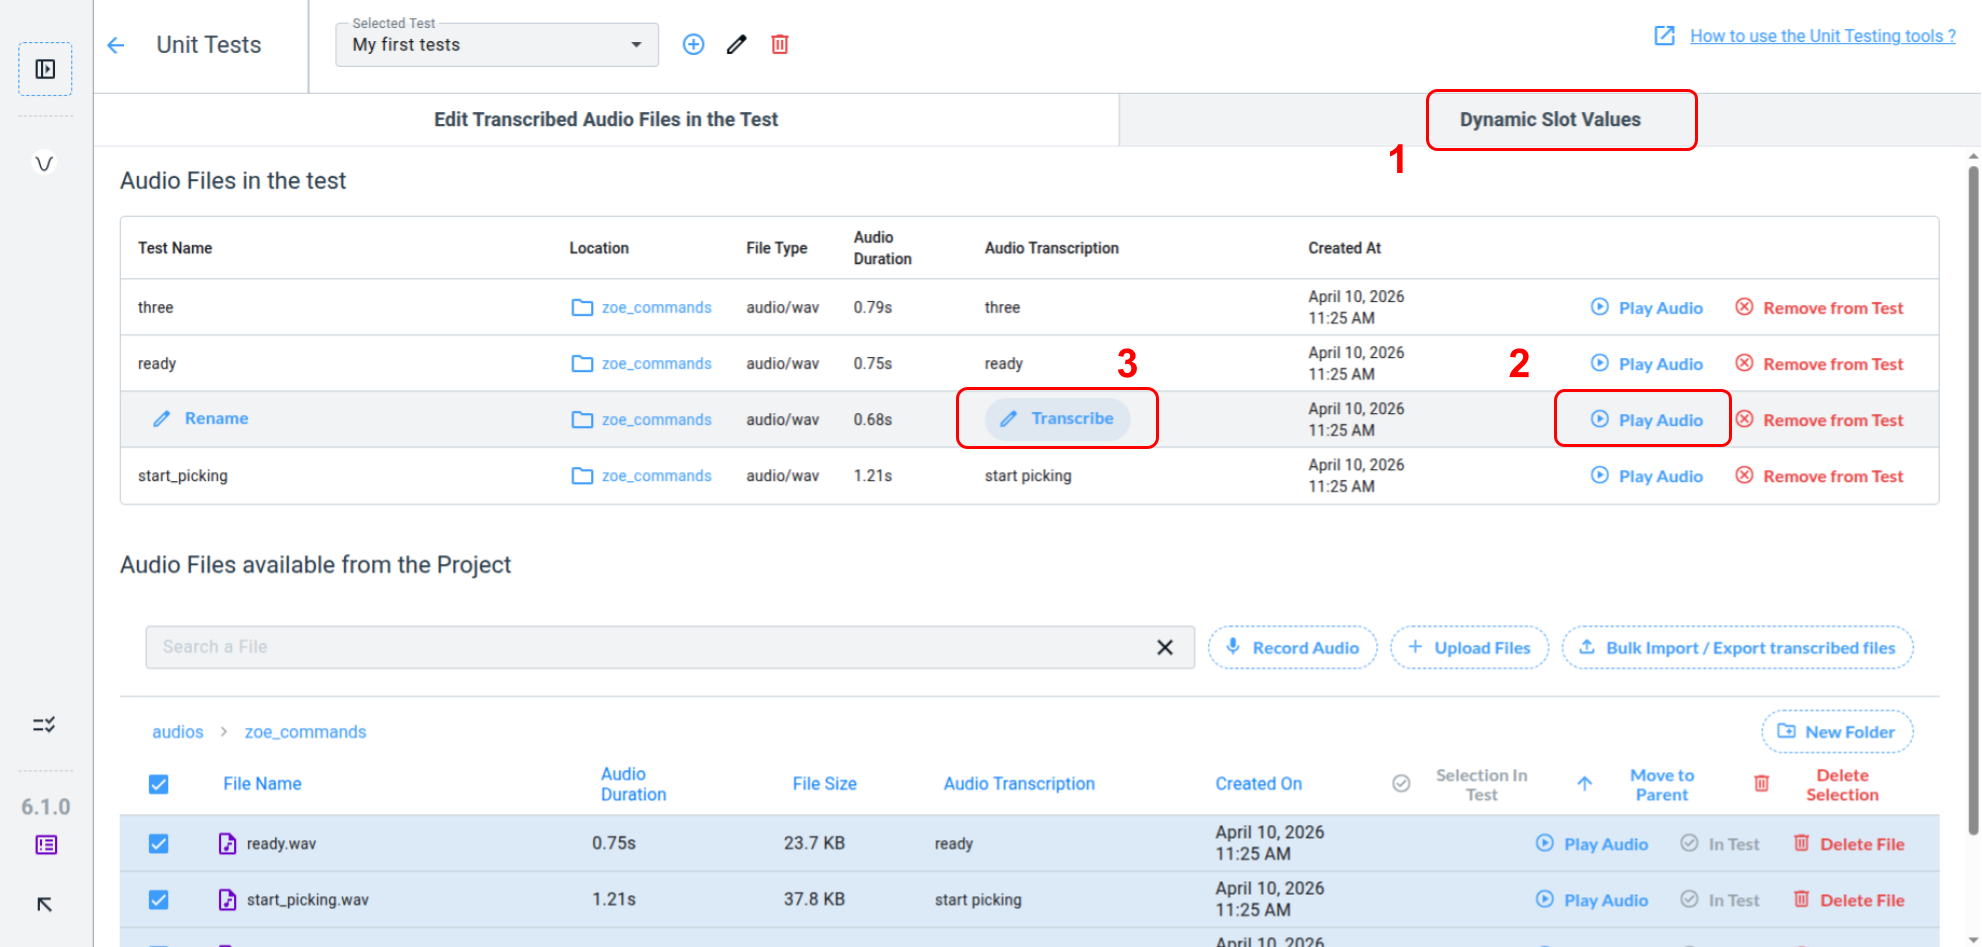
Once your files have been added to the test, you can either proceed to the Dynamic Slot Values tab (1) or continue editing your tests by playing the audio (2) in order to verify it match exactly matches the transcription (3).
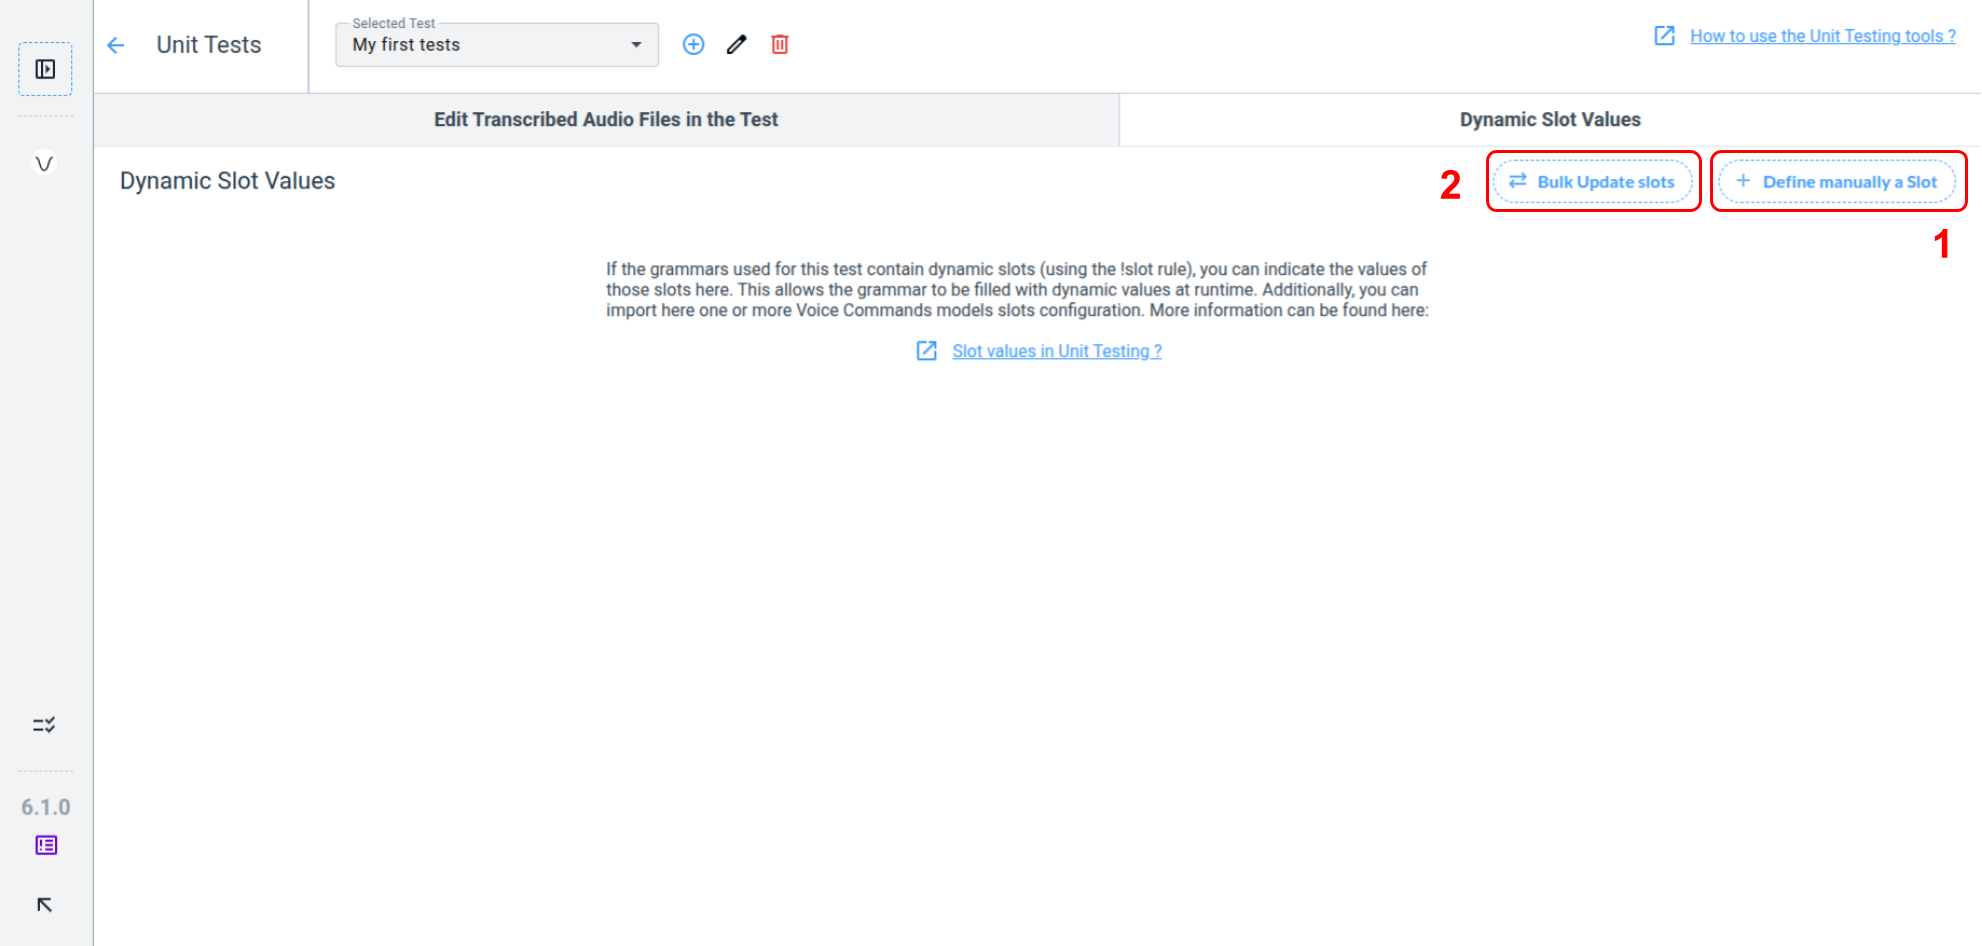
If your grammar contains any slots, fill the slot values with the Define manually a slot button (1). You can also import a CSV file containing your Slots values using the Bulk Update Slots button (2).
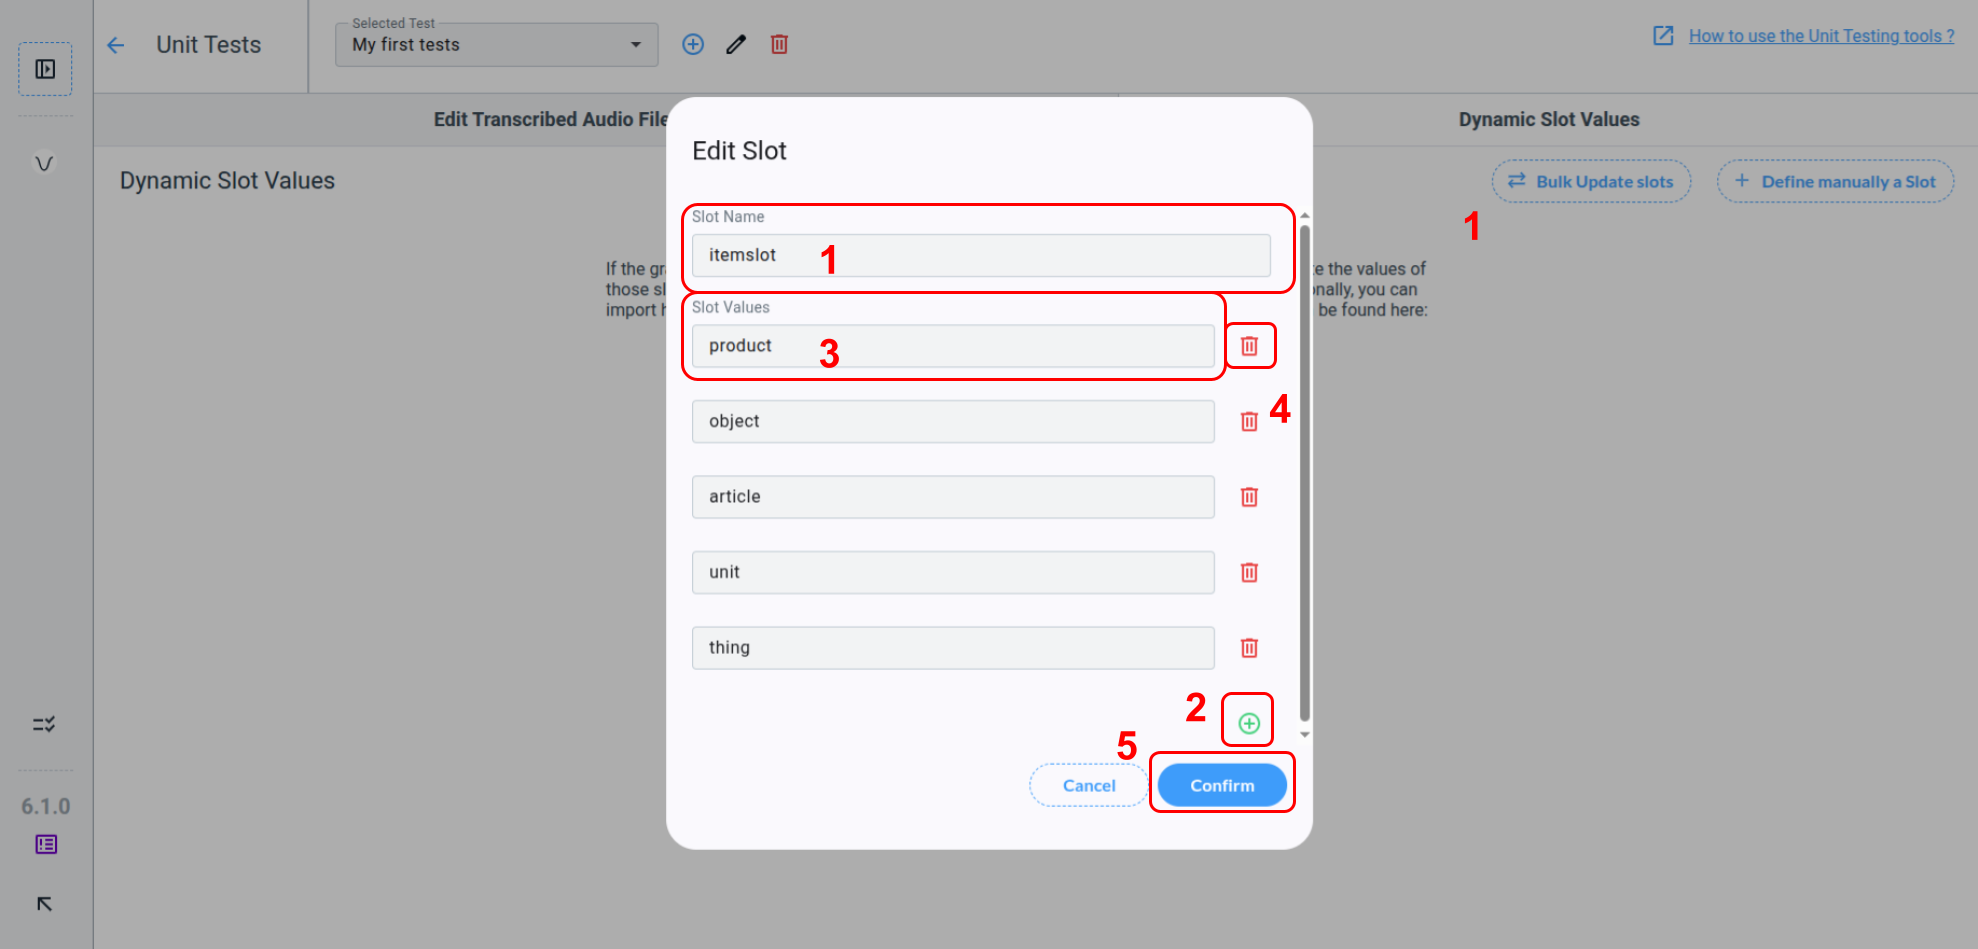
Define Slot Values manually

The modal for defining slot values requires the slot name (1). Click + button (2) to add a value to the slot. When editing a slot value in the dedicated field (3) you can press Enter to automatically create a new slot value - this speeds up the process. To remove a value, click on delete button (4). Do not forget to Confirm (5) otherwise your changes will not be saved.
Define Slot Values from CSV file
If you pressed the Bulk Update Slots button in the Dynamic Slot Value tab, you should see this modal appear.
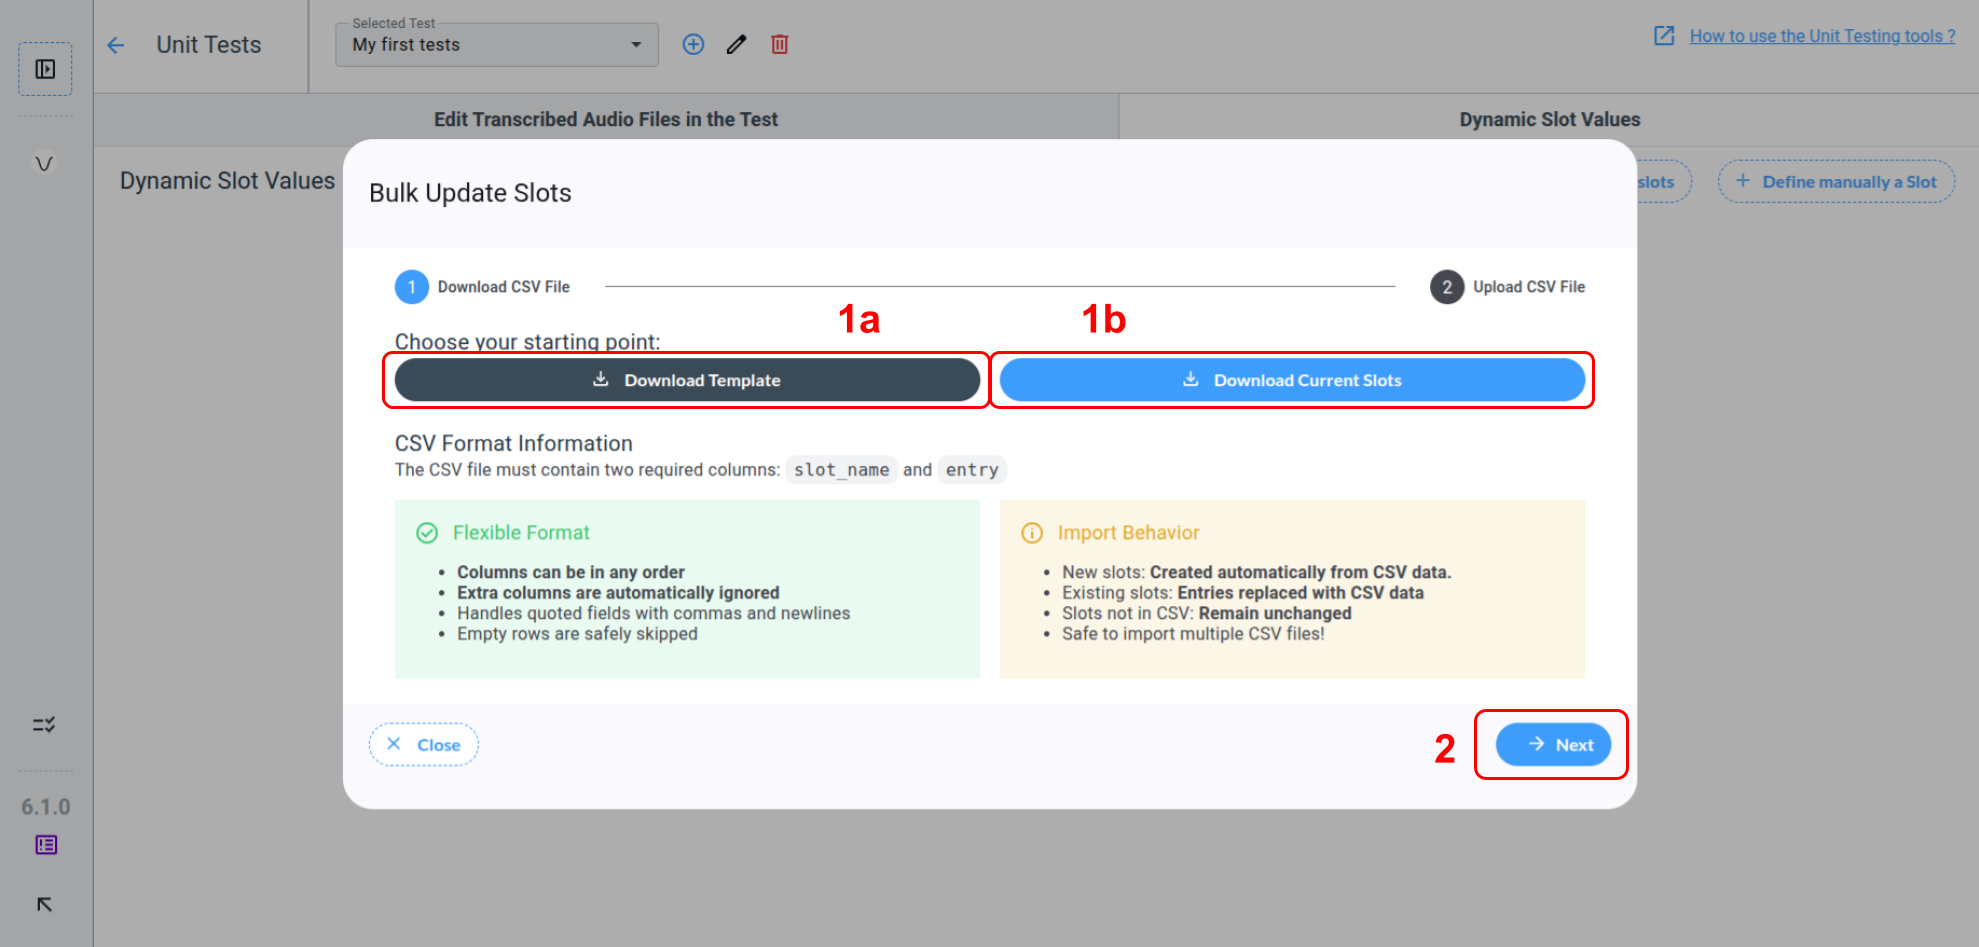
You can press the Download template button (1a) to obtain the .csv file template or directly download the actual slots in the Unit Test you are editing using the Download Current Slots button (1b).
CSV Structure
The CSV file must contain two required columns (in any order):
-
slot_name: Name of the slot -
entry: One value added to the slot
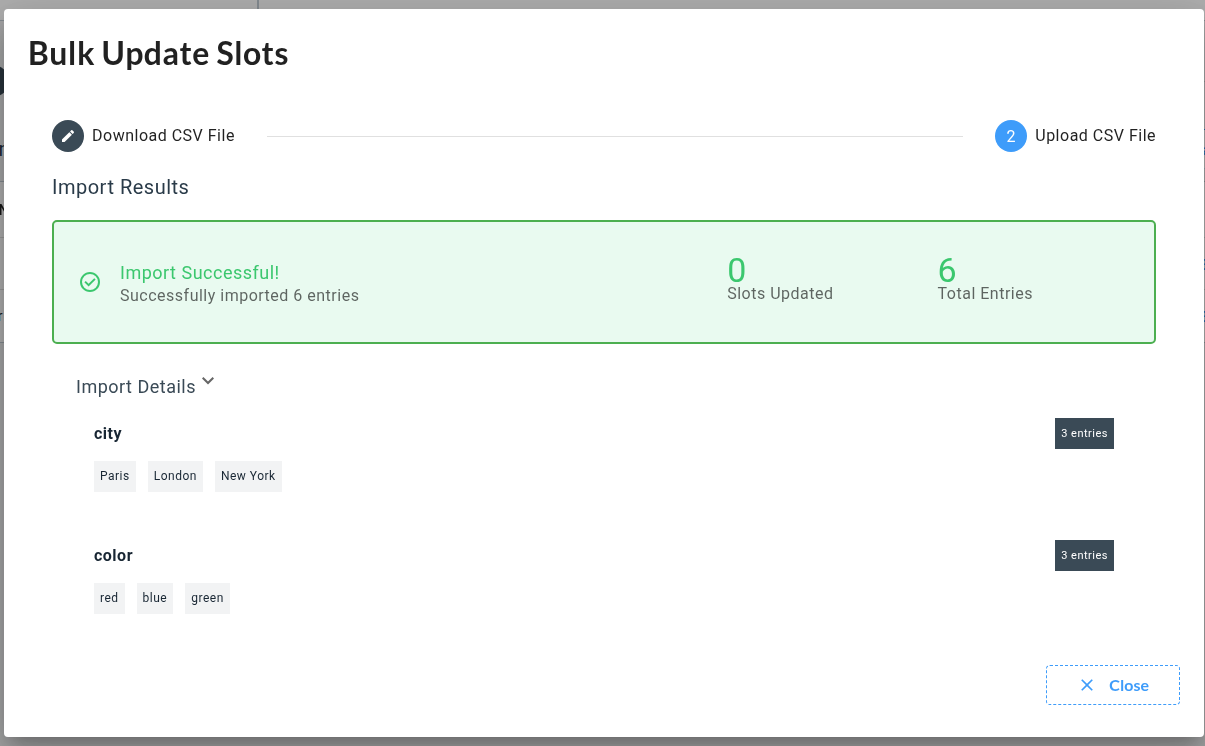
Example CSV (assets.csv):
slot_name,entry
city,Paris
city,London
city,New York
color,red
color,blue
color,green
Import Behavior
When you import this CSV (or a modified version):
-
CSV is parsed with flexible column ordering
-
New slots are created if not existing
-
Existing slot values are removed to save the .csv file values
-
Existing slots are untouched if not present in the .csv file
-
Invalid rows are ignored
In the Unit Testing Dynamic Slot Values tab, you can import the .csv files exported from different Voice Commands Models multiple times to fill all slots for each model.
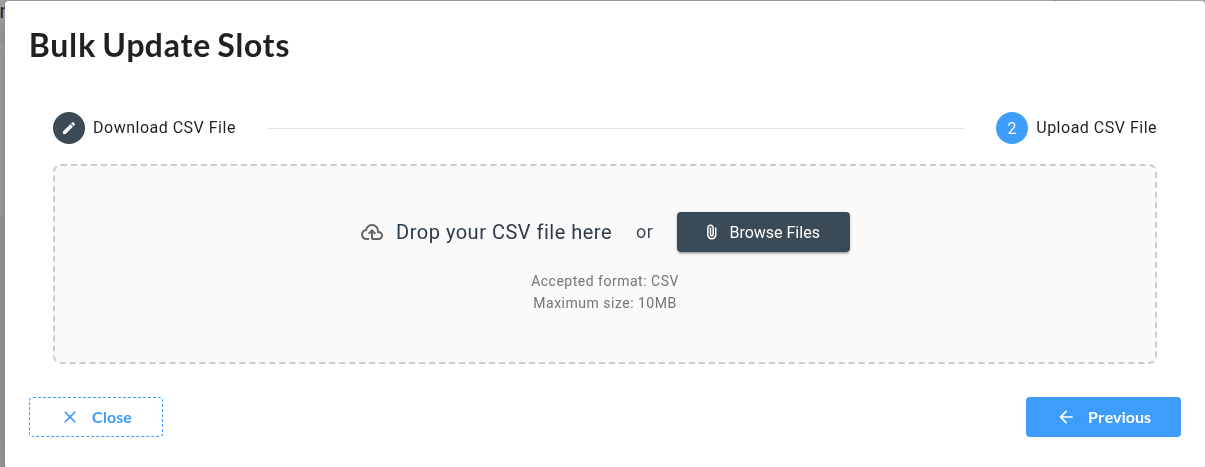
Drag and drop your .csv file or browse it to start the import process.
Understand Results
When a Test leaves the pending state, it becomes either a success or a failure. A success means all Unit Tests inside it pass. If any Unit Test fails, the entire Test fails.

Below are the details of this tests to help you understand Unit Tests Results in depth:
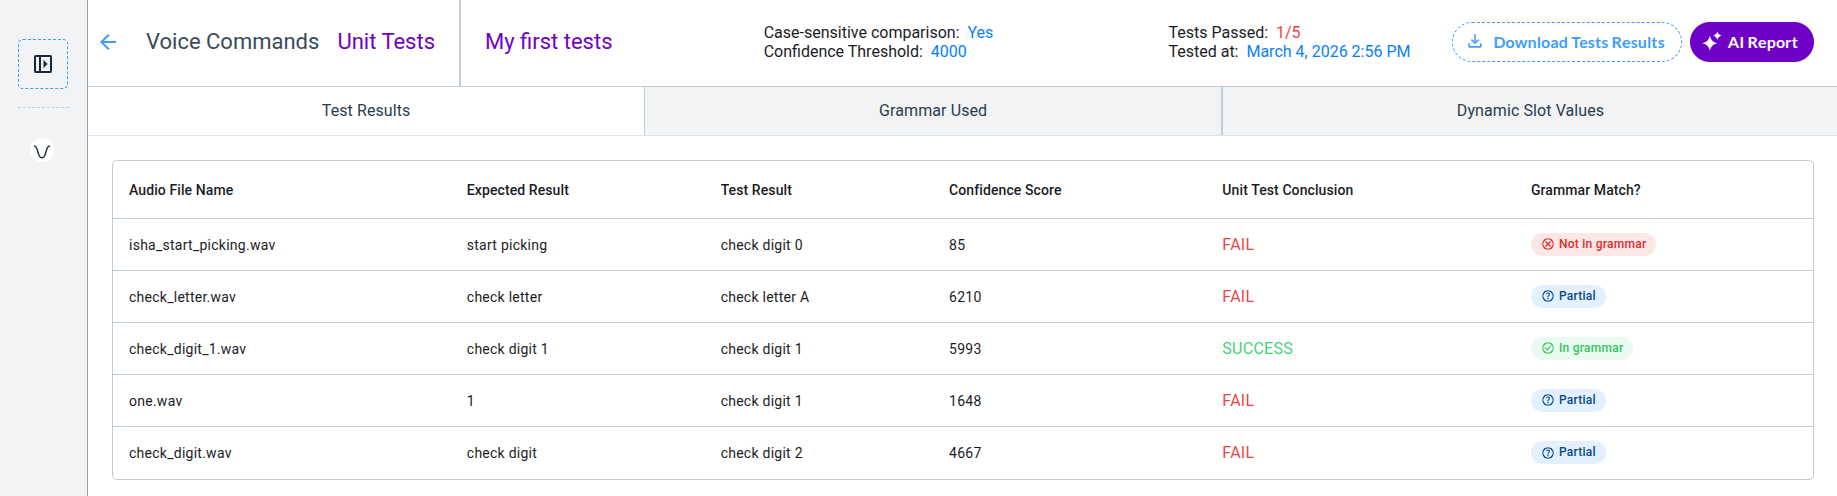
This page displays the Unit Test Results, which include:
-
Test parameters at the top of the screen:
-
Case-sensitive comparison setting
-
Confidence threshold
-
Date and time when the test execution completed
-
-
The first tab, featuring a table for each individual test:
-
A comparison of the Expected Result and the Test Result
-
A Confidence Score associated with the Test Result, indicating the recognizer’s confidence that the Test Result matches what was actually said
-
A Conclusion for each test. Fail or Success, depending of the comparison strategy.
-
A Grammar Match indication. It helps understand why the test is failing.
-
Grammar Match : The Test includes a verification that the grammar contains a solution to match expected result ot the Test. If no solution can be found, the result is Not In Grammar. Partial means that the transcription can be included in a solution, but not with exact match. When a exact solution is found, the grammar match the audio transcription, result is In Grammar and the test conclusion is up to the recognizer to do the job.
Case-Sensitive Comparison
The voice command recognizer returns the most probable result from the grammar options. This means it can only answer with commands defined in the grammar. Consequently, unit tests will strictly compare audio transcriptions to the recognized commands, including case and orthography.
This strict comparison can sometimes cause a test to fail for the wrong reason: the command may be recognized correctly, but a poorly written transcription can trigger a failure.
Let’s explore a few examples where the Unit Test fails but should pass.
Case 1: false negative
A false negative occurs when a transcription differs from the grammar, leading to a failed Unit Test even though the recognizer understood the command correctly.

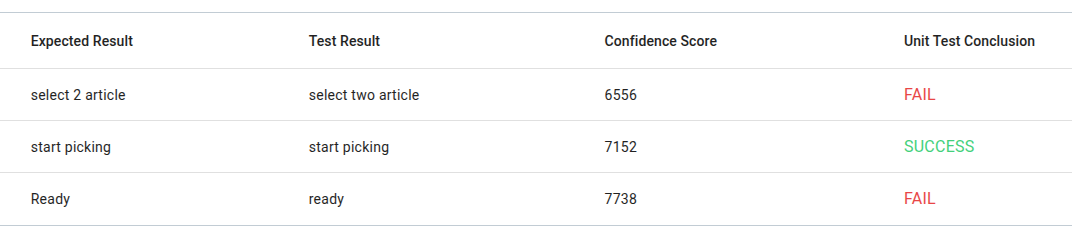
In this example, the grammar options are “ready” and “two”. “Ready” or “2” aren’t valid.
You can fix this by changing the transcriptions, aligning the case and the orthography with the grammar.
Do not fix it by adding multiple grammar options that "sound" the same. For example, do not write "2" | "two" in your grammar just to pass the test.
Case 2: grammar structure errors
#BNF+EM V2.1;

!grammar VoicePickGrammar;

!start <main>;

<main>: <direct_pick>;

<direct_pick>: "start picking" | "select" !optional(<itemtype> <itemnumber>);

<itemtype>: "article" | "object" | "item";

<itemnumber>: "one" | "two" | "three" | "four" | "five";
Let’s assume this grammar tries to achieve those type of commands:
-
start picking item four
-
select article two

Since it worked for “select article two,” the grammar seems to function as intended. At first glance, it seems the recognizer fails to understand “item four”. However, the root cause is a structural error in the grammar that the syntax parser cannot detect. This error prevents the grammar from being used as designed.
The error comes from this line:
<direct_pick>: "start picking" | "select" !optional(<itemtype> <itemnumber>);
Like in logic, OR (the symbol |) follows the priority rule. This means the optional item type and number apply only to the “select” option, just as addition applies only to a factor in an equation.
7 x 4 + 5 = 7 x 20 = 140
7 x 4 + 5 = 28 + 5 = 33
In order to get our grammar work as intended, the rules must be separated like this :
<main>: <direct_pick> !optional(<itemtype> <itemnumber>);

<direct_pick>: "start picking" | "select";
This way, the grammar applies the condionnal statement no matter what have been found in the <direct_pick> rule before.

This example demonstrates that unit testing can uncover structural errors in grammars. Run multiple tests—even seemingly trivial ones—because small details can hide critical issues.