

Audio Front End, or Speech Enhancement, improves voice recognition accuracy by processing input audio. It filters noise and adjusts volumes, reducing echoes and environmental sounds, so that only the speaker’s voice reaches the recognizer.
Widget Navigation
Let’s start by identifying the widget's main options.
-
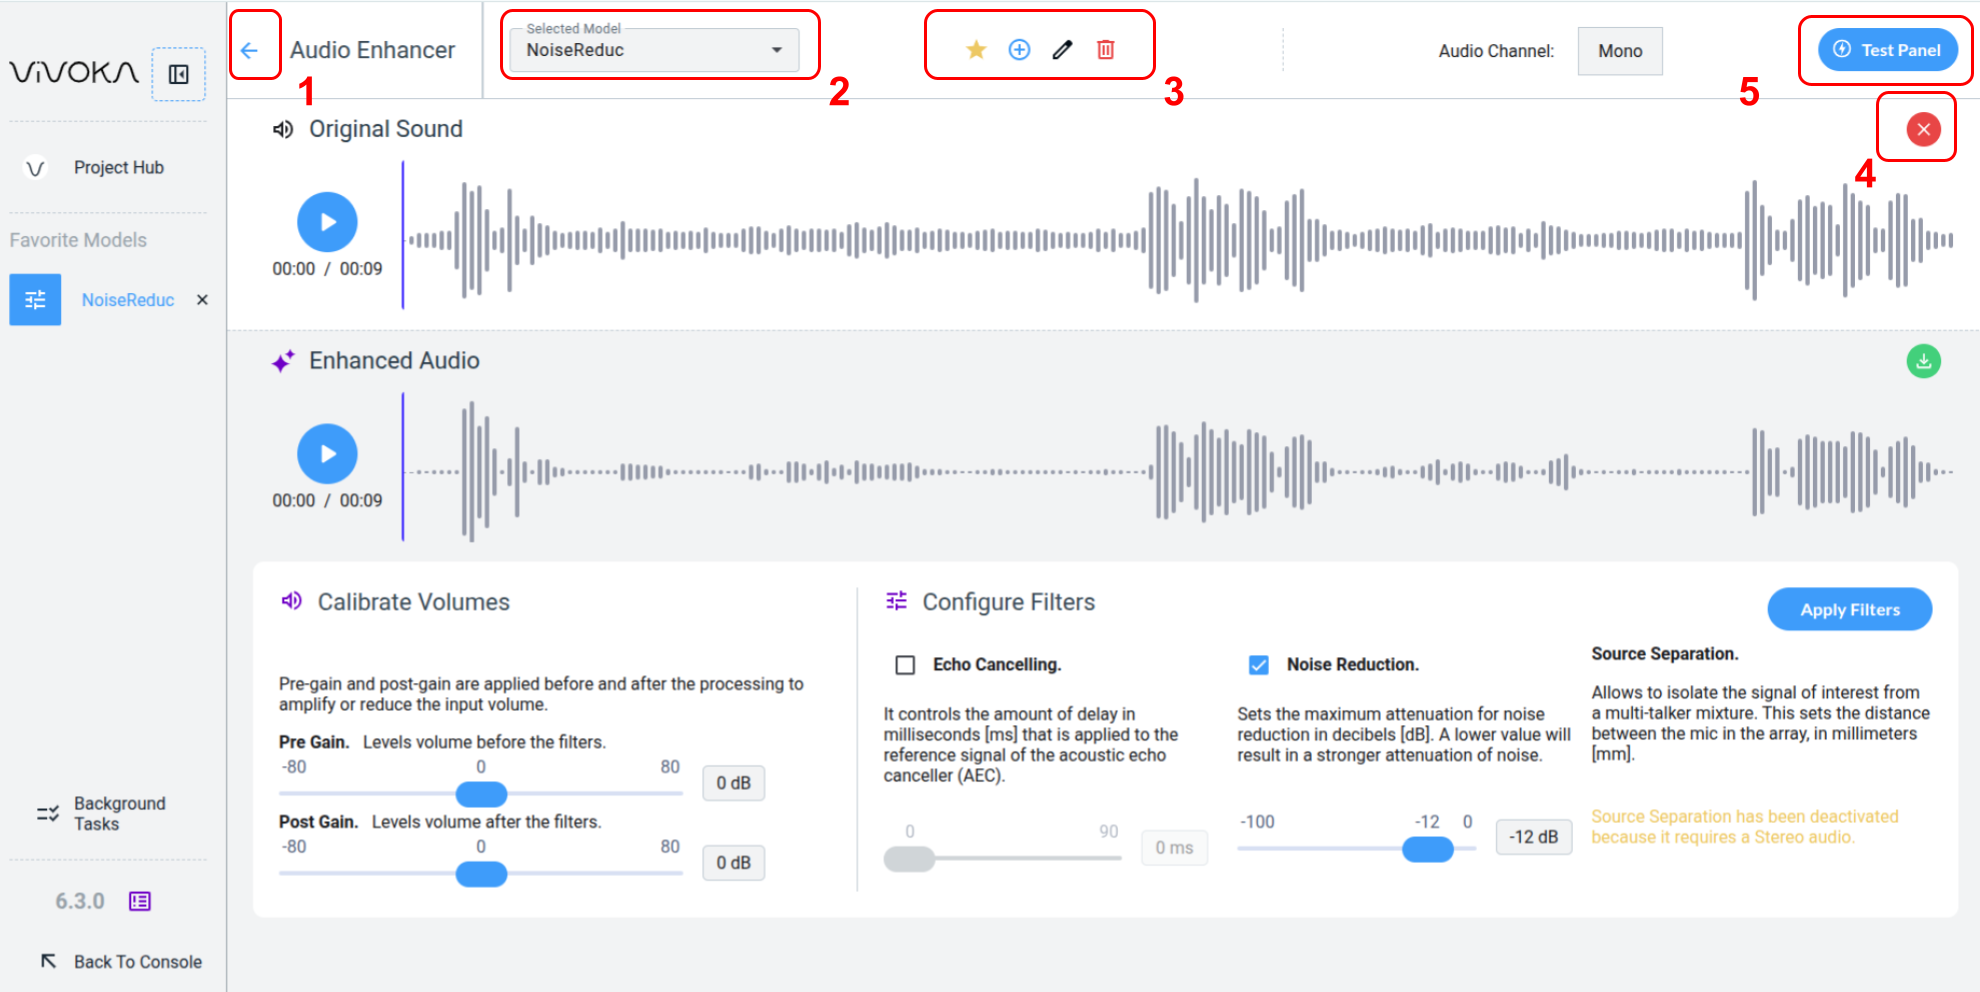
Navigate between your models Navigate back (1) to the Project Hub
-
Change the Selected Model (2) you are currently editing
-
Use the widget global editing tools (3) to:
-
Add the model to Favorites
-
Create a new model
-
Rename the model
-
Delete the model
-
-
Close the opened audio asset (4) in the widget to return to the Audio Asset Manager and select another file.
-
Quick Test (5) your model in real time using one of your Voice Commands models in the dedicated panel.
Configure the Speech Enhancer
Let’s explore this Widget step by step:
-
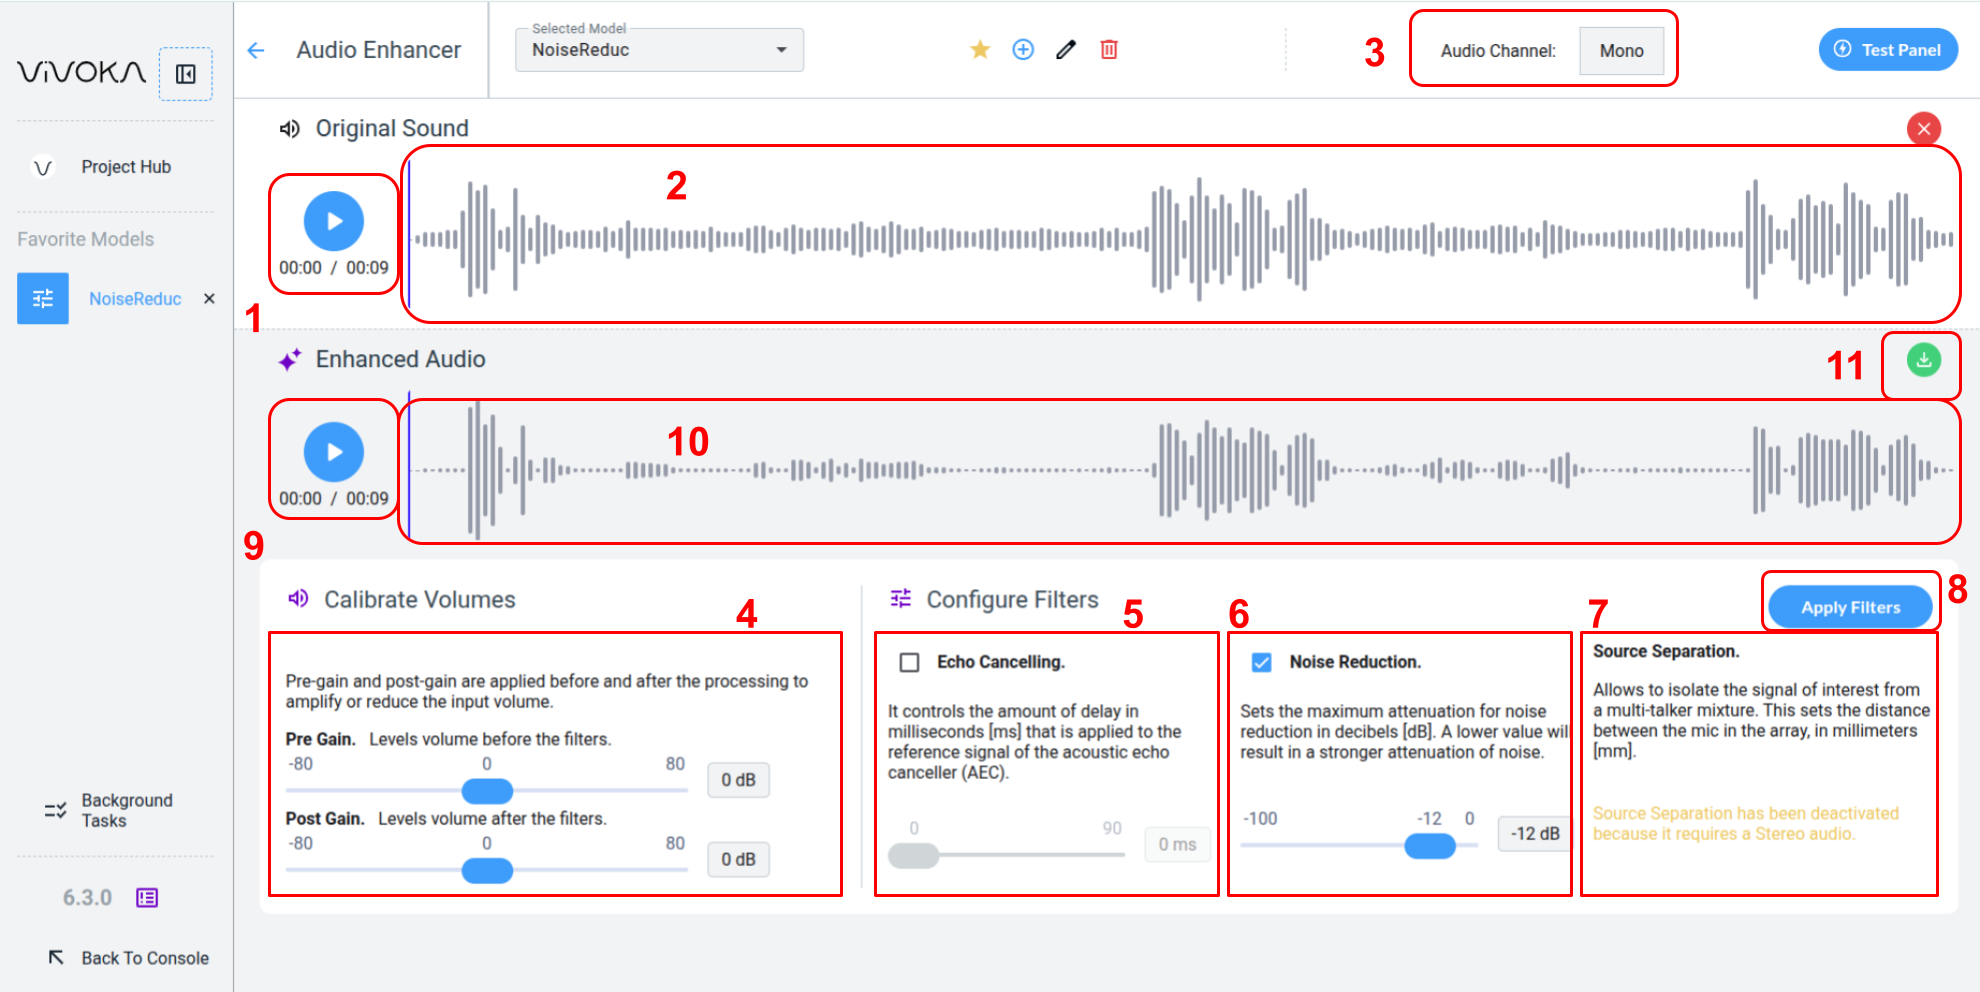
Your model uses an original ausio as a reference to verify that the enhanced output matches your objectives.
-
You can listen to the original audio (1) and move the blue cursor (2) to play a specific segment.

-
The number of channels in the original sound (3) is important, as it determines the mode of the widget: mono or stereo. This is displayed at the top of the widget. To change the Speech Enhancement model's mode, use a different original audio file.
-
Volumes (4) let you control the signal amplitude, before and after the filters.
-
Echo cancellation (5) manages the delay, in milliseconds, applied to the host’s reference signal for the Acoustic Echo Canceller (AEC). This improves echo reduction when a significant delay exists between the reference and near-end signals. The delay offset should be estimated and rounded down. If the offset exceeds the actual delay, the AEC may fail. When uncertain, set a safe minimum with at least a 5 ms margin.
-
Noise reduction (6) sets the maximum noise attenuation in decibels. Lower values increase attenuation. Different applications and recognition engines may require specific settings, so adjust according to your scenario.
-
Source separation (7) isolates the target signal from a multi-talker mix. Specify the distance between microphones in the array, in millimeters. The algorithm isolates signals coming from the direction perpendicular to the microphone line.
-
Apply Filters (8) to generate enhanced audio using your configured parameters.
-
You can listen to the enhanced audio (9) and move the blue cursor (10) to focus on a specific segment.
-
You can download the enhanced audio (11) for external use or include it in your project via the Audio Asset Manager. Refer to the dedicated documentation for details.
Understand the difference between Echo Cancellation and Noise Reduction
Noise reduction filters the signal based on amplitude. Loud sounds near the microphone, like voice, remain mostly unaffected, while distant, quieter sounds are removed.
But what if a sound close to the microphone, such as the device's synthetic voice response, is heard while the user speaks? This is where echo cancellation comes in. It removes a specific isolated audio from another audio containing it, a common feature.
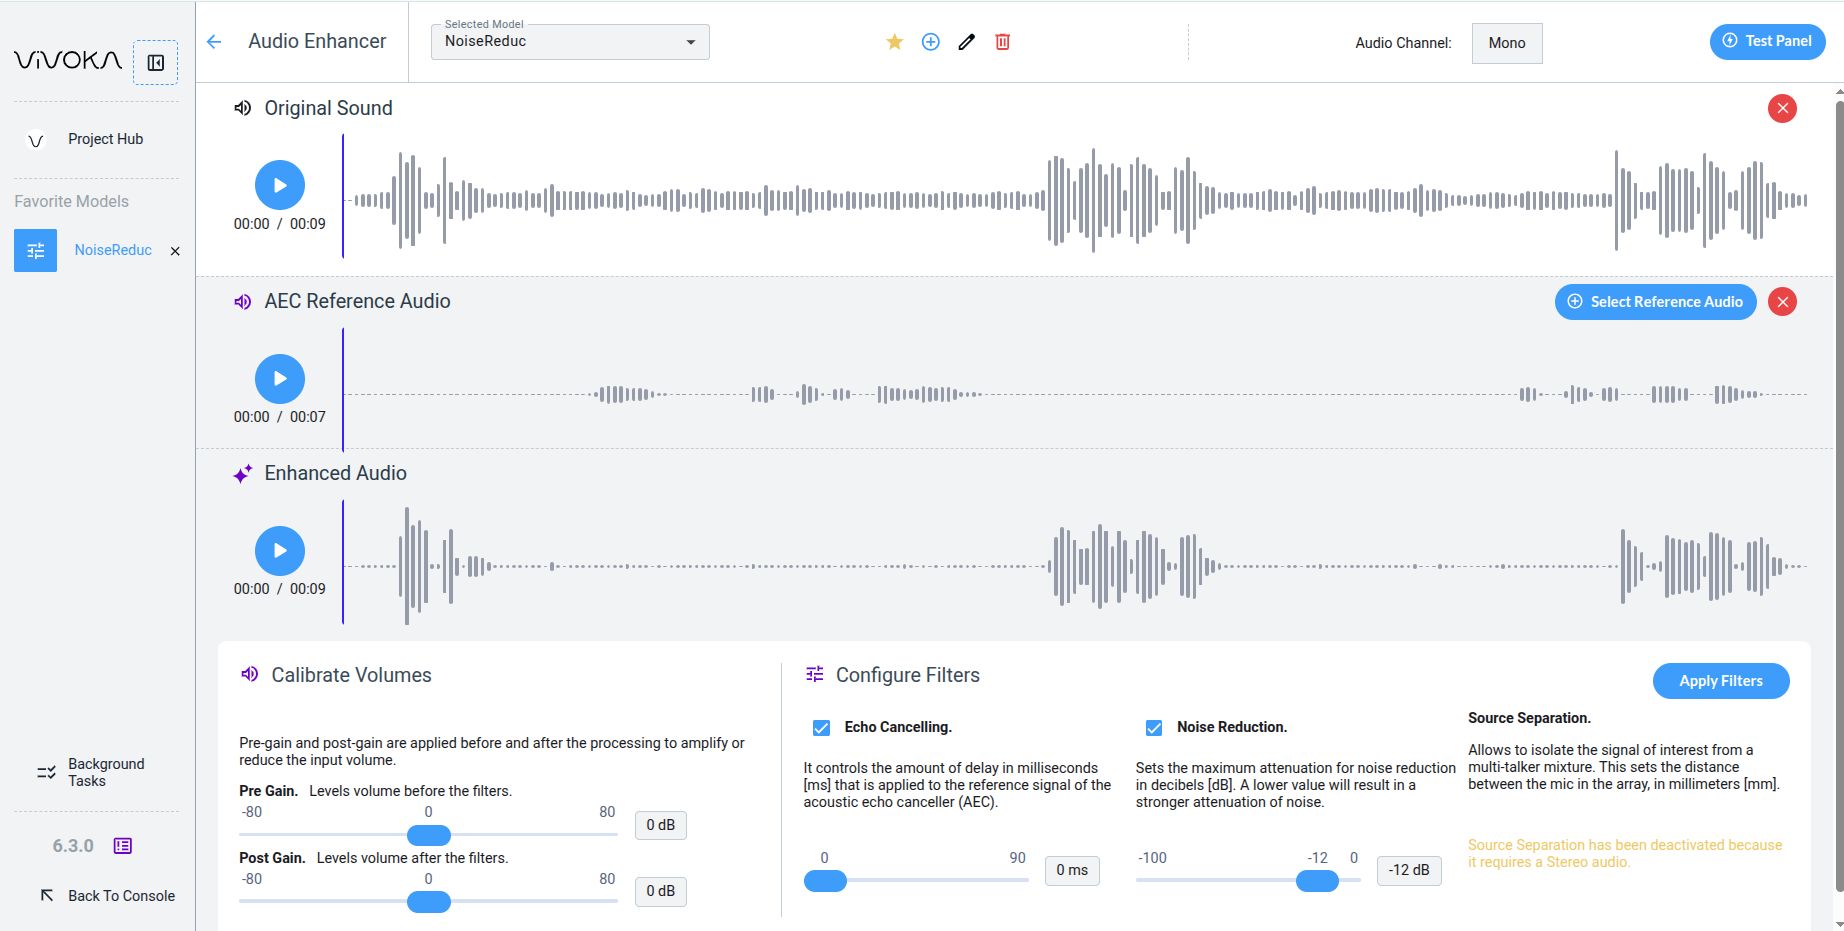
When using Echo Cancelling in the Widget, you must provide a reference audio to suppress from the Original Audio alongside Noise Reduction. The last noisy parts of our Original Sound audio are now gone without excessive Noise Reduction.
Note that you cannot test Echo Cancelling in other parts of VDK Studio. This feature requires a dynamic noisy predictive sound from your product or environment, making it too specific for the Test Panel or Unit Testing.
Testing the Speech Enhancement Model
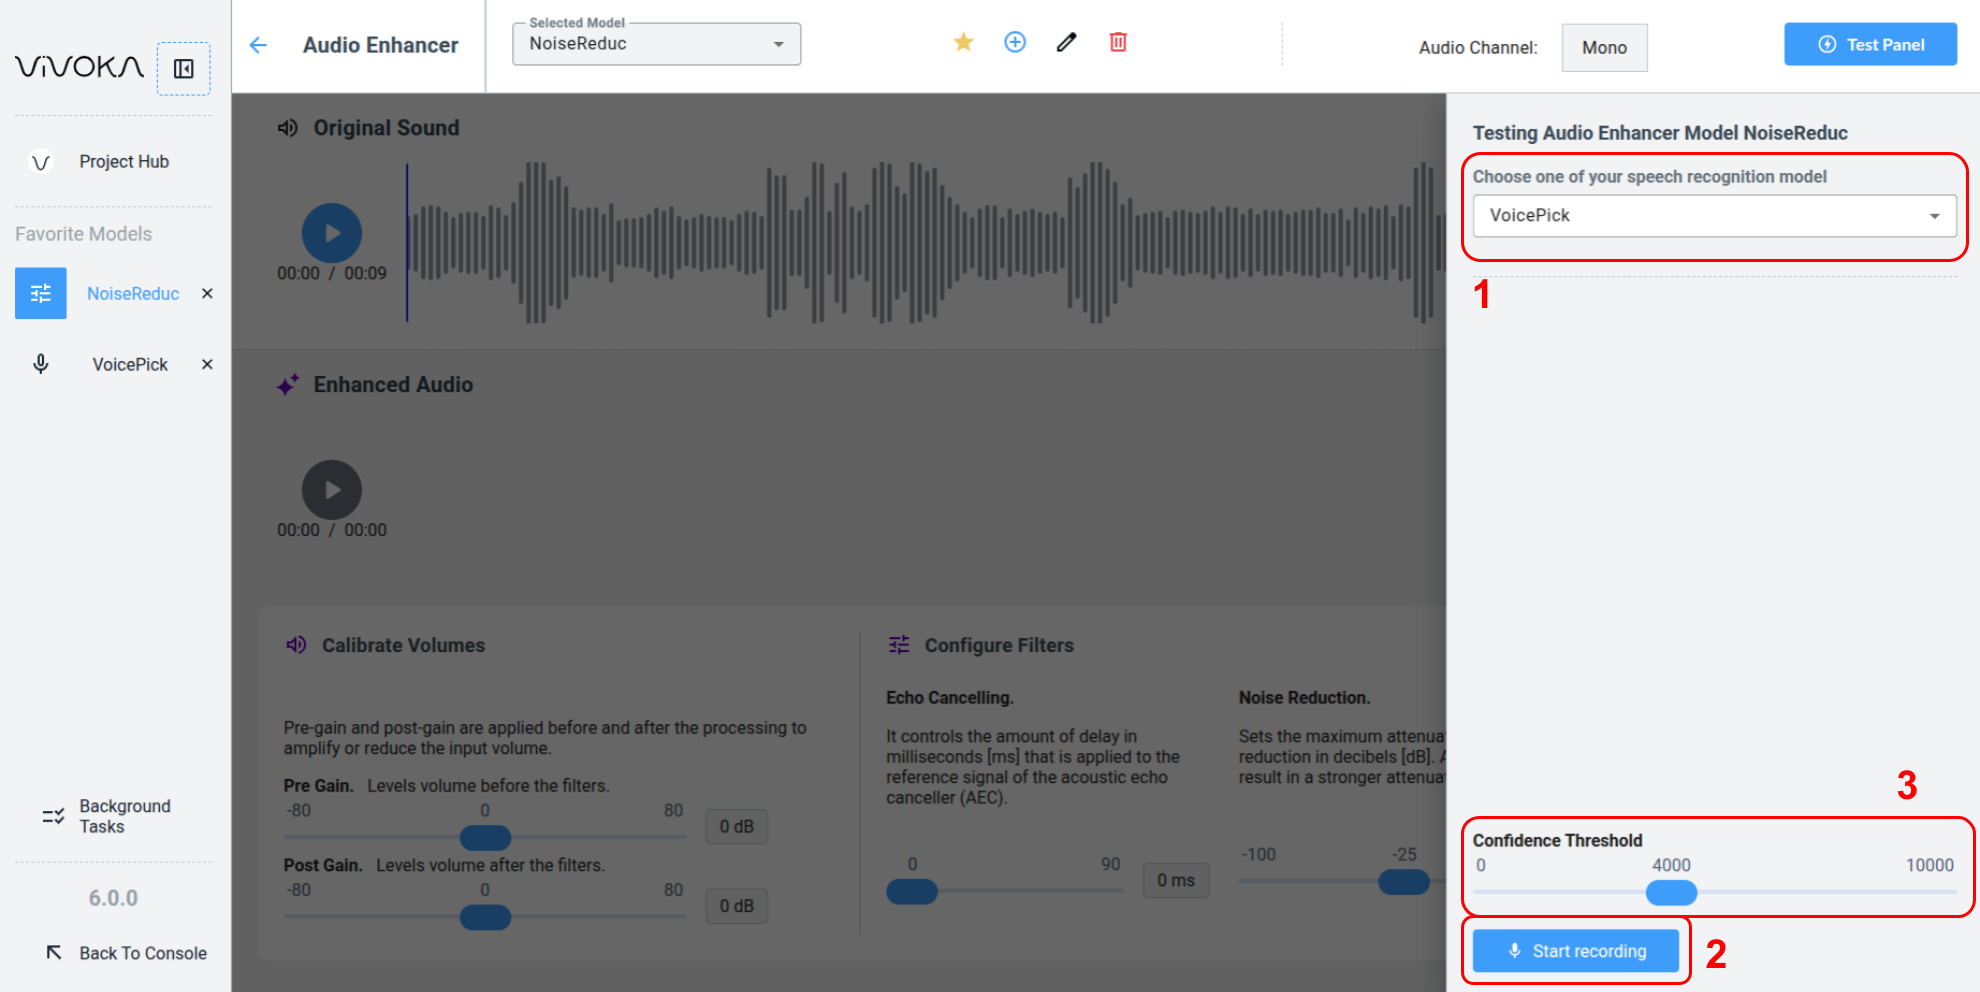
First, select a preconfigured Voice Commands model (1) from your project. Then click Start Recording (2). Adjust the Confidence Threshold (3) to display only hypotheses taht meet your minimum confidence score.