

The Speech Enhancement technology is used to enhance the audio quality and extract relevant features that can be used by speech recognition algorithms.
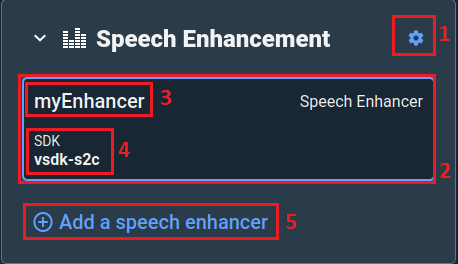
Speech Enhancement - Card
-
Speech enhancement settings. This button will open the Speech Enhancement settings which allows you to manage speech enhancers.
-
Speech enhancer card. Click on this card to open the speech enhancer main screen.
-
Speech enhancer name. The name of the enhancer was chosen during the creation step.
-
Speech enhancer SDK. VDK currently offers a single SDK, which is known as
vsdk-s2c -
Add a speech enhancer. This button will open a new wizard that allows you to add a new speech enhancer to your current project.
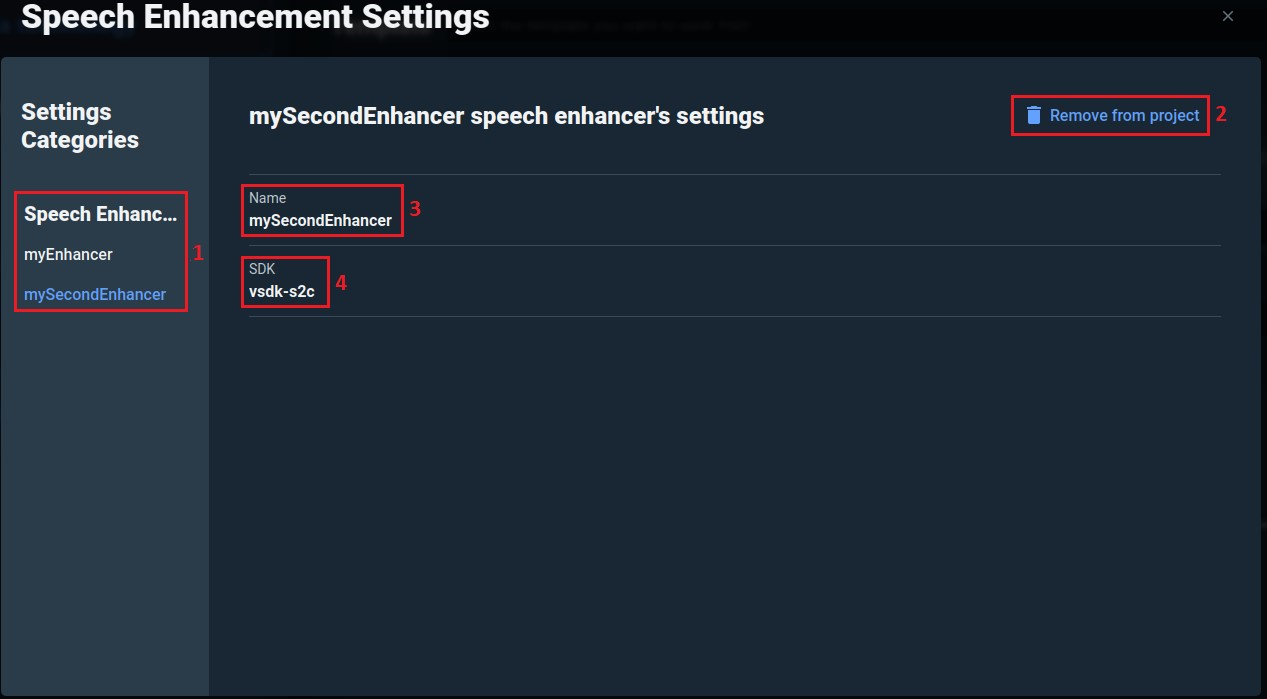
Speech enhancement settings screen
-
Speech Enhancers. The list of enhancers in your current project. You can choose an enhancer from the list and remove it.
-
Remove from project. Once you select your enhancer you can use this button to remove it.
-
Name. The Enhancer name is read-only and you can’t modify it.
-
SDK. The SDK selected during the creation step.
Speech Enhancer - Main Screen
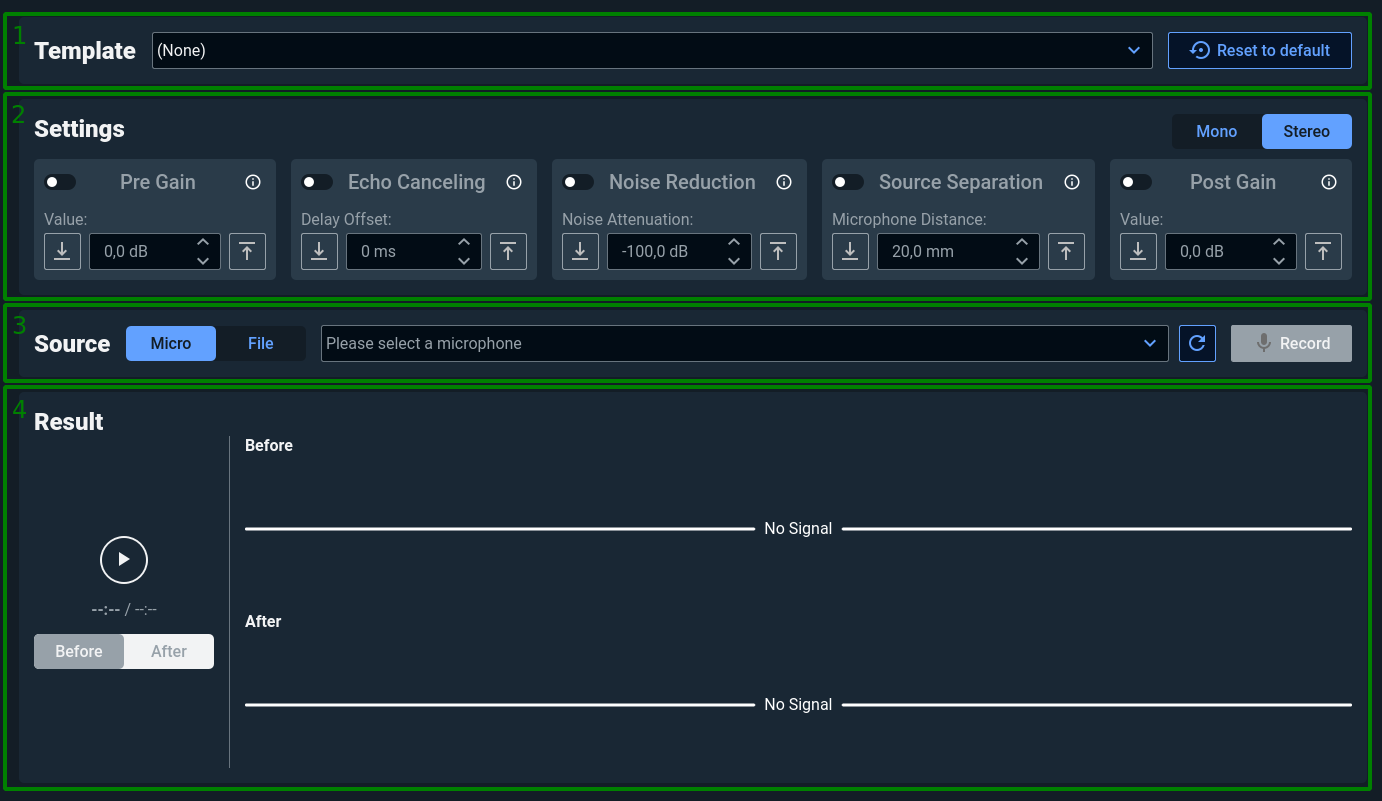
The main screen is divided into 4 sections:
-
Template. Users have the option to either use a pre-configured template as it is or modify it to fit their needs.
-
Settings. This section contains all the possible settings you can apply to your input audio signal. Each individual card has been designed to offer dedicated processing capabilities. Here is the complete list of cards:
-
Pre Gain. If enabled, It applies a gain to the microphone(s) signal before processing;
-
Echo Canceling. If enabled, It removes the echo caused by the audio emitted by the loudspeaker and captured by the microphone;
-
Noise Reduction. If enabled, It removes undesired background noise;
-
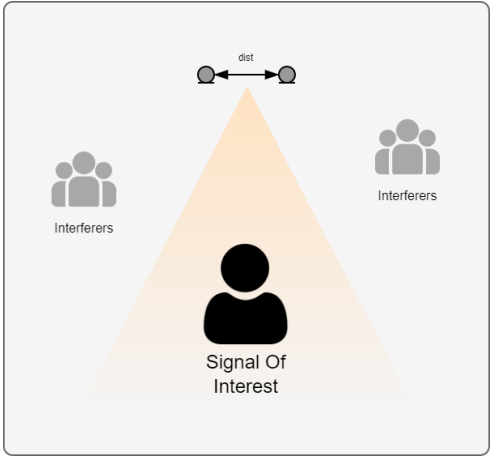
Source Separation. If enabled, It separates sources and isolates a signal of interest from a multi-talker mixture;
-
Post Gain. If enabled, It applies a gain to the microphone(s) signal after processing.
-
-
Source. Depending on the state of the Micro/File toggle you can either record audio or upload an audio file.
-
By clicking on Record, you will be able to record audio with your microphone. Before you start recording, ensure that you have selected the appropriate audio device. If the input device you are searching for is not listed, try to refresh the list by clicking on the refresh icon.

-
By clicking on Select an audio file or by clicking on the Open icon you will be able to import an audio file from your computer (Audio files must be Signed 16-bit Little Endian, Rate 16000 Hz PCM). Click on the Process button after selecting the correct file.

-
-
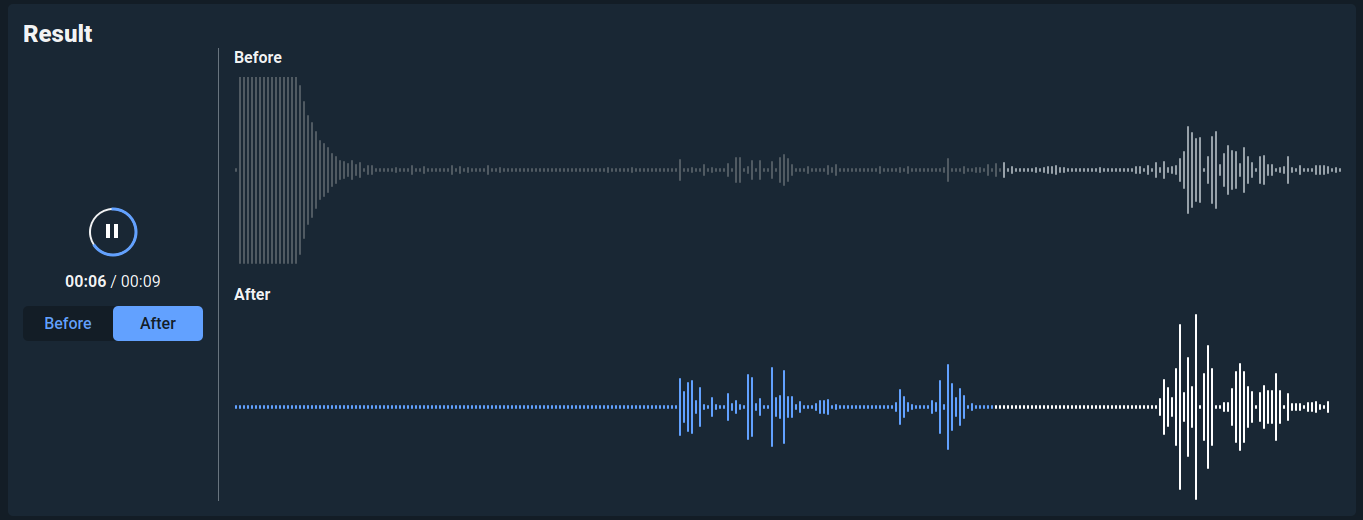
Result. You can find the result of applying the speech enhancer to your input audio here. The original input audio is also available for comparison.
-
Toggle to Before and click the Play icon to listen and visualize your original audio signal.
-
Toggle to After and click the Play icon to experience your newly enhanced audio signal.
-
Some settings such as the Noise Reduction will require more computation time
Please note that the application of Source Separation is limited to stereo audio.
Source separation isolates signal coming from the direction perpendicular to the line of the microphone array, as shown in the figure below.
How to add a speech enhancer?
-
In the Speech Enhancement card, click on Add a speech enhancer.

-
In the opened wizard, you need to provide a name for the speech enhancer (e.g.,
myEnhancer) and click on Next. -
Finally, click on the Add to project button.
You can see your newly created enhancer in the speech enhancement card.